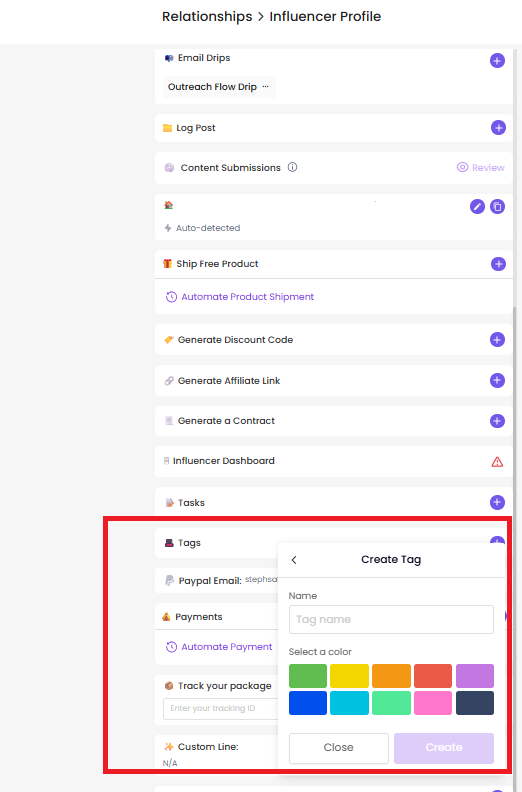
The Tag feature allows you to assign custom labels to influencer profiles within your lists. Here's how it works:
Create tags inside an individual influencer’s profile first.
Once created, these tags will appear under the Tag section.
You can then bulk assign tags to multiple influencers at once.
Use case example:
If your eCommerce store sells pet food, you might tag influencers as “cat owner” or “dog owner”. This helps you:
Personalize email messaging
Filter for targeted campaigns
Prepare for bulk product gifting based on pet type
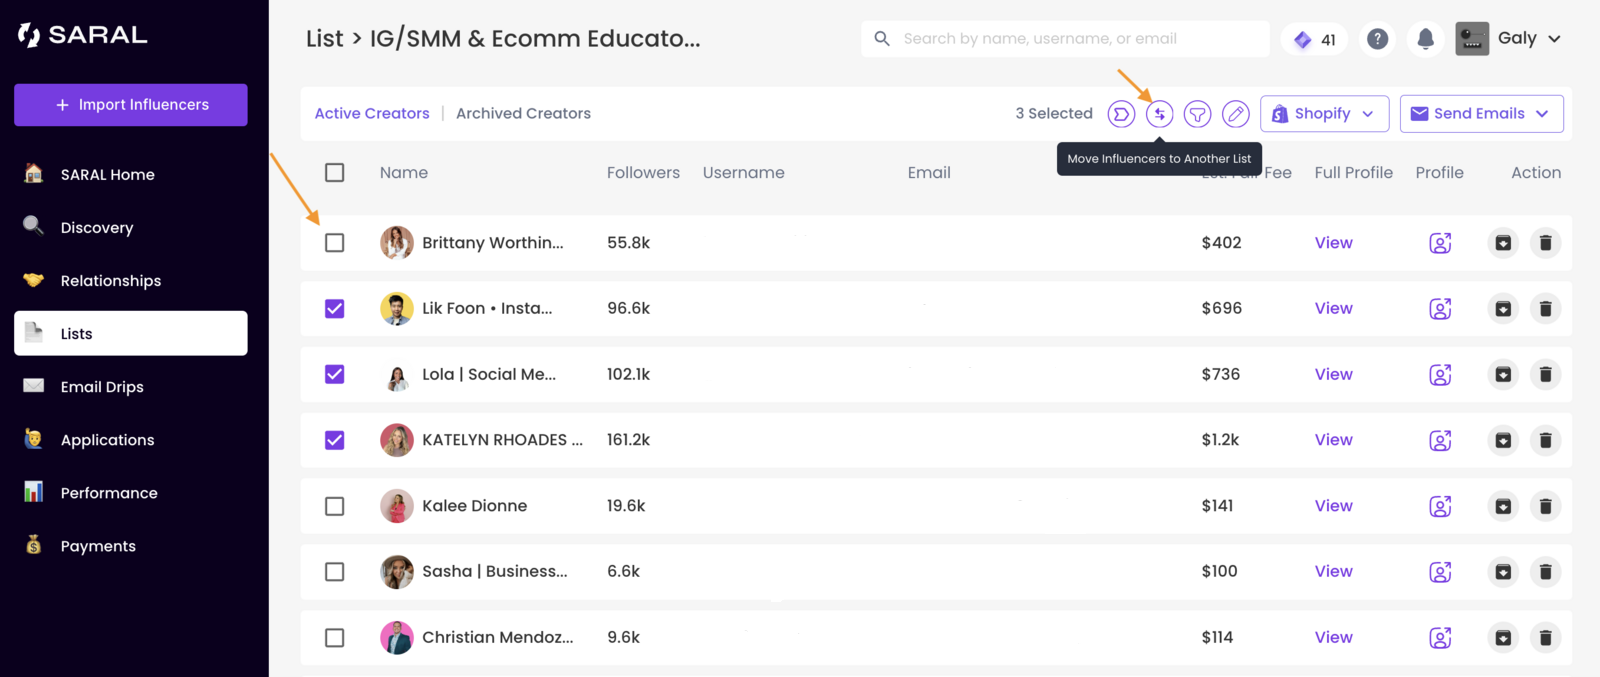
You can easily transfer influencers from one list to another by selecting them within a specific list, clicking the 🔁 move icon, and choosing the new destination list.
Common scenarios for using this feature include:
Accidentally adding influencers to the wrong list
Moving non-responsive creators to a “No Reply” or blacklist list after multiple follow-ups without a response
You can easily generate bulk tracking links and discount codes for influencers directly from your Lists — no more one-by-one manual work.
Go to the relevant List.
Apply filters to target a specific stage (e.g., Onboarded)
Bulk select the influencers you want to update.
Click Shopify Magic to perform bulk actions
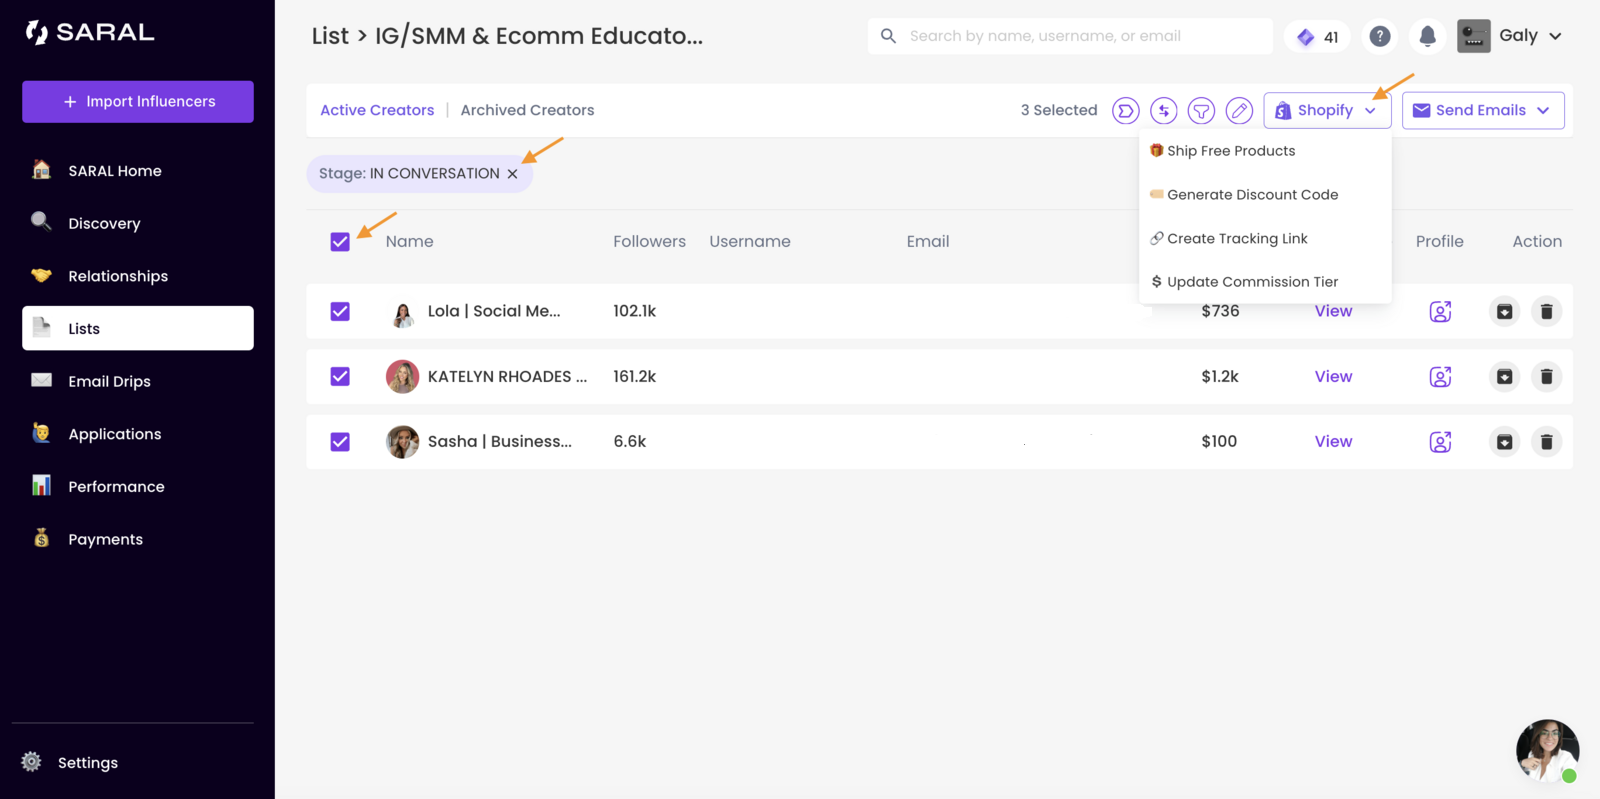
From your specific list, select multiple influencers from your list.
Click the Shopify Magic icon and choose "Ship Free Products" from the dropdown.
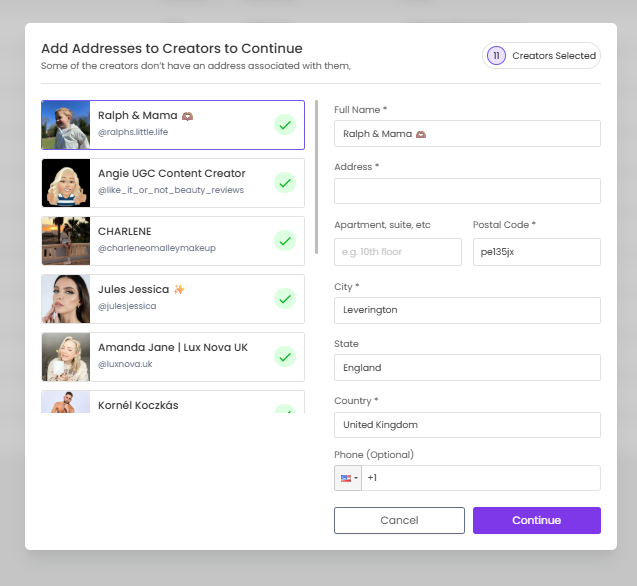
Enter each influencer’s address, then click “Continue.”
Select the product variants you want to send.
When you ship through SARAL via your Shopify store:
A $0 order will be created and tagged as “SARAL Influencer.”
A tracking link will automatically be added to each influencer’s profile.
Bulk select the influencers from your desired list.
Click the “Send Emails” button.
Choose the email campaign you want to send.
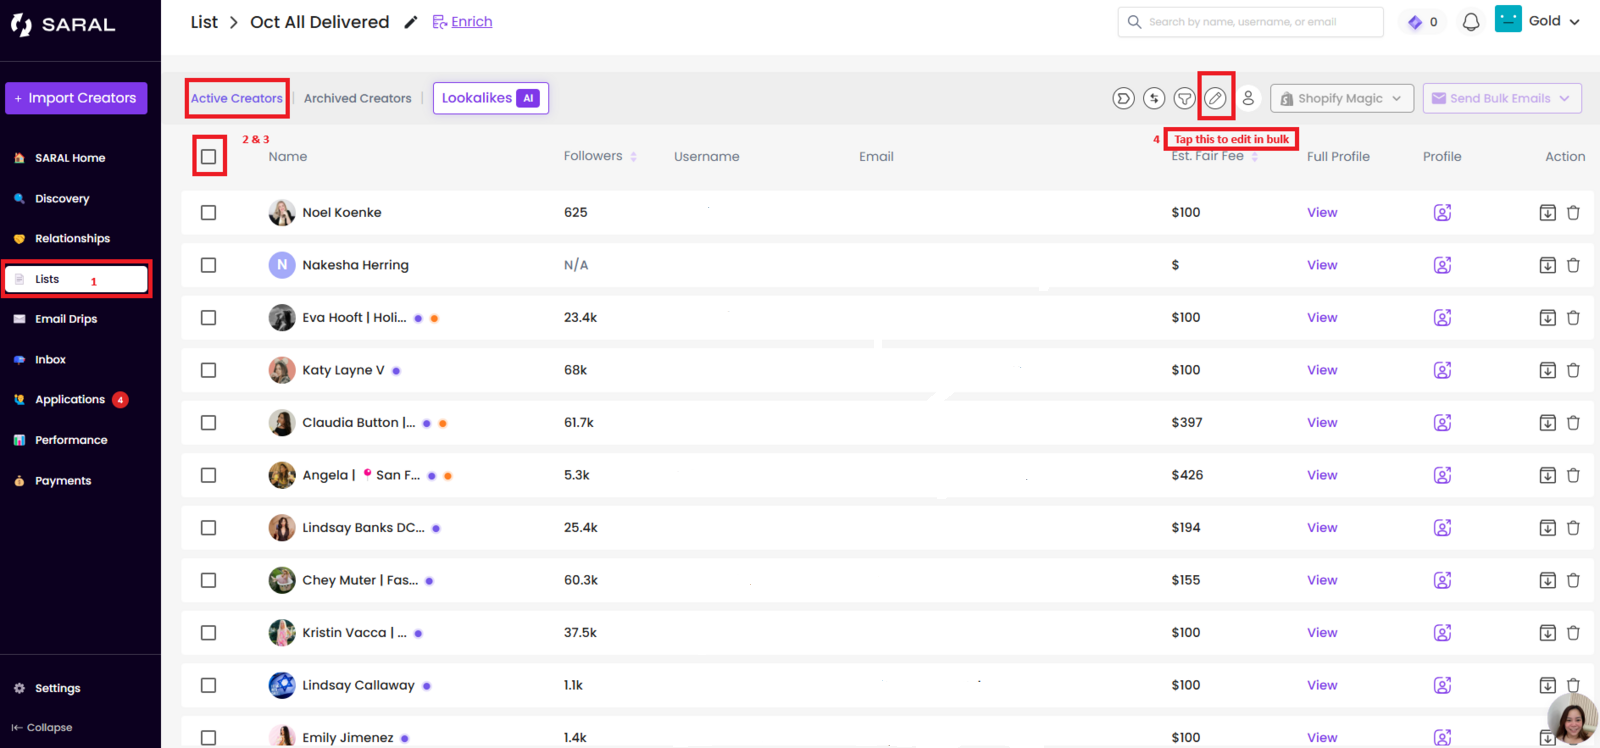
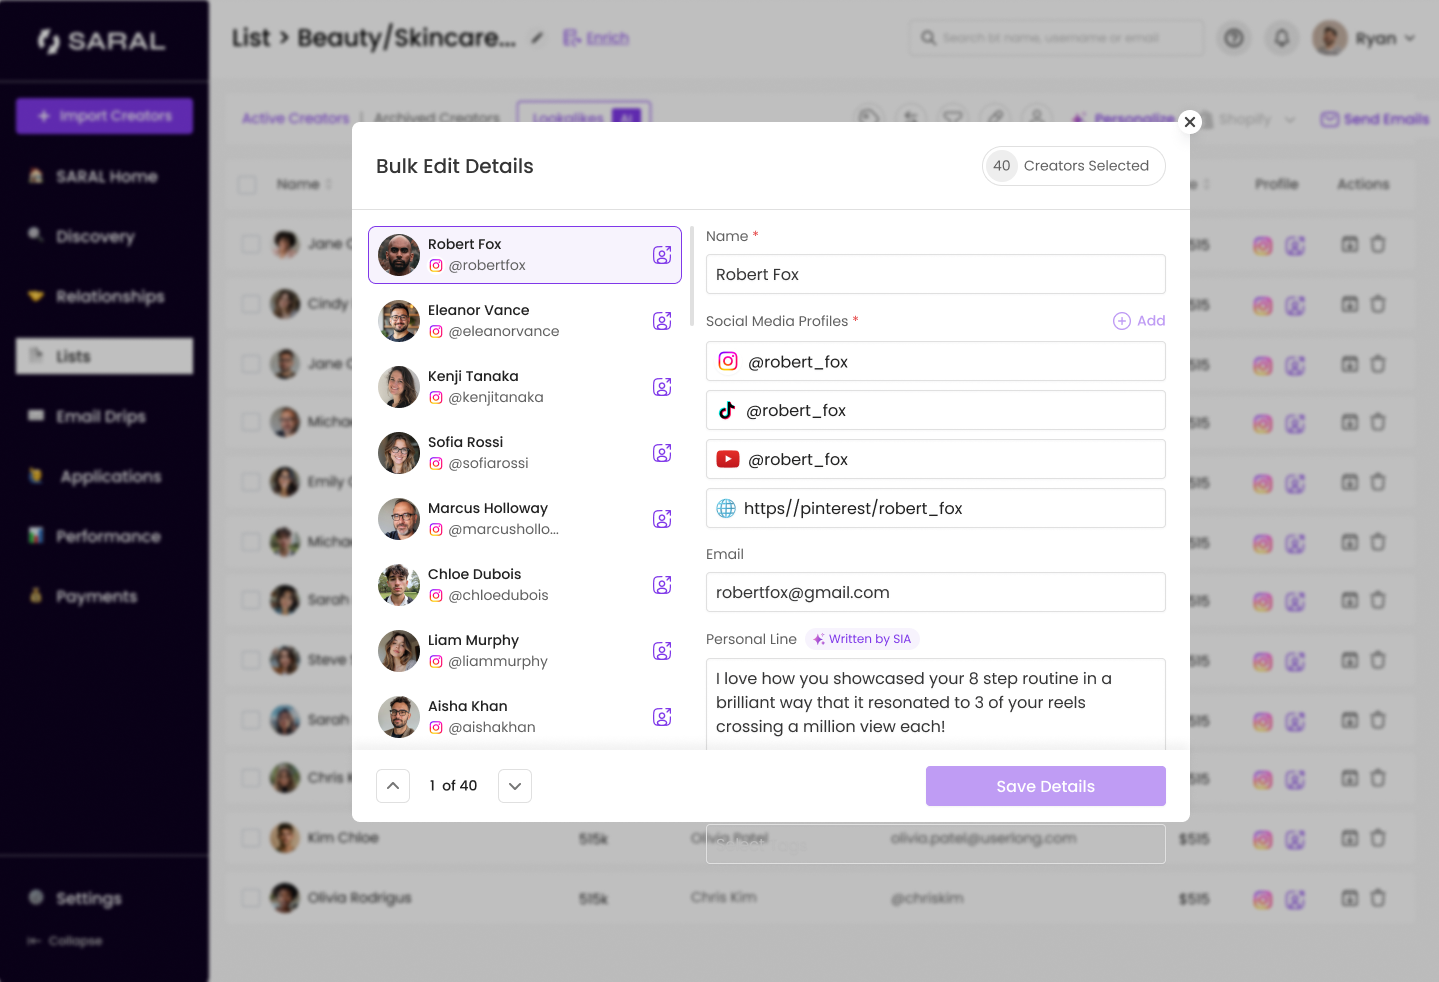
Updating influencer details can be a time-consuming task, especially when managing a large number of creators. Our Bulk Edit feature helps you save time by updating influencer information all at once, without having to visit each profile.
Go to Lists and select the specific list you want to edit.
Click the Edit icon.
Either select all influencers or choose specific creators by checking the boxes next to their names.
Once you’ve made your selections, you can update various influencer details in bulk including their name, email address, tags, and social media profiles. Beyond just Instagram, TikTok, or YouTube) you can also add custom URLs such as Pinterest profiles, personal blogs, or portfolio sites.
Don’t forget to save your changes to apply them.
Reach out anytime with our helpful Support team using the button at the bottom-right corner of your dashboard, or email us at [email protected].