
In SARAL, you can create a personalized signature for each inbox connected to the platform. Here's how:
Go to SARAL Settings and click on Connected Emails
Click the Settings icon (⚙) next to the connected email you want to personalize
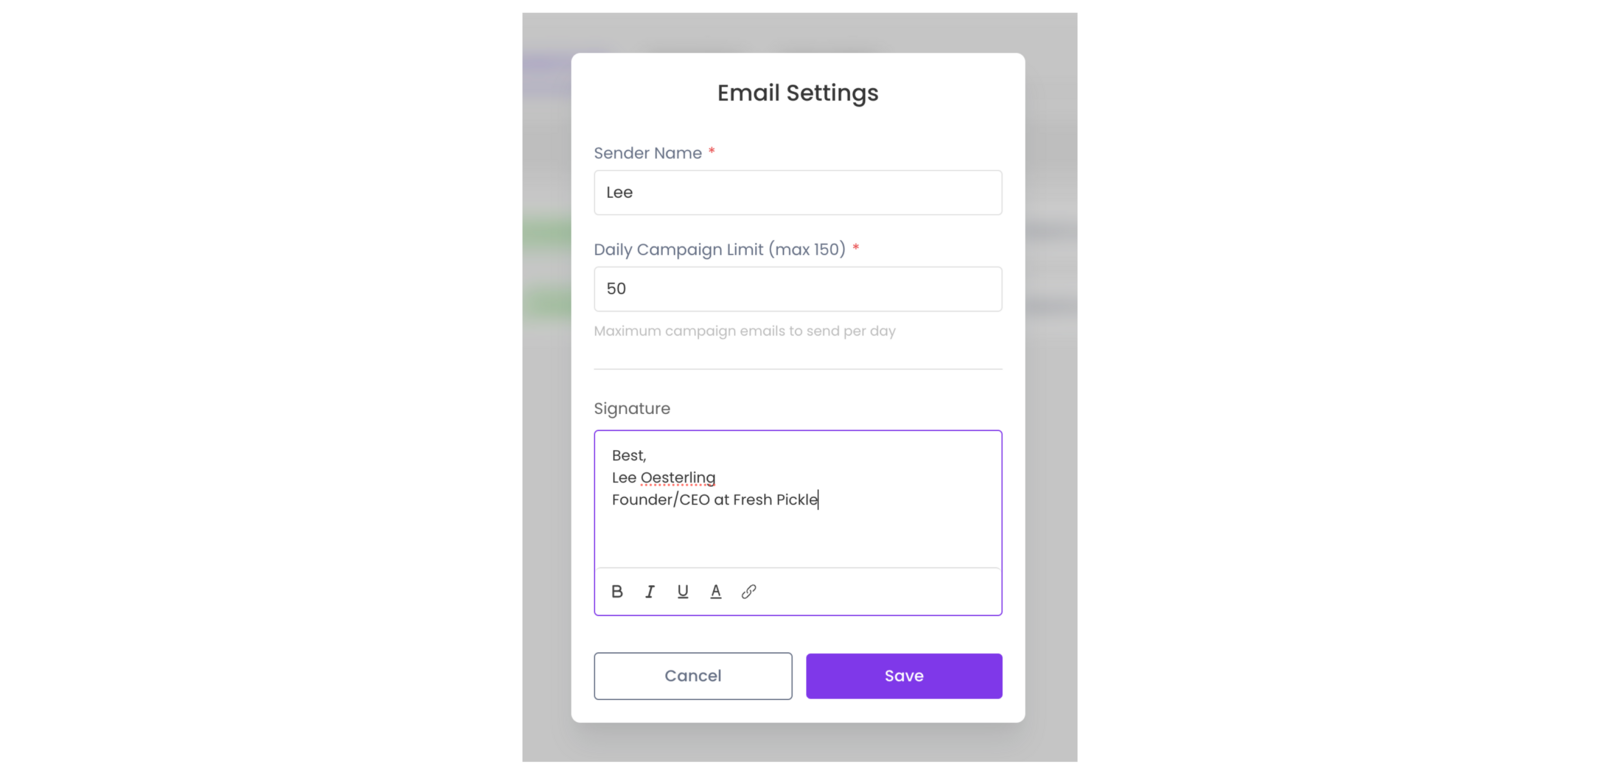
In the signature box, format your signature using various options like bold, italics, text color changes, and hyperlinks (e.g., linking to your company website).

Benefits of Adding a Signature
Including a signature is especially useful for teams with multiple members managing accounts or using separate addresses for different campaigns. It helps maintain consistency and professionalism across all communications.
Where can I preview my signature
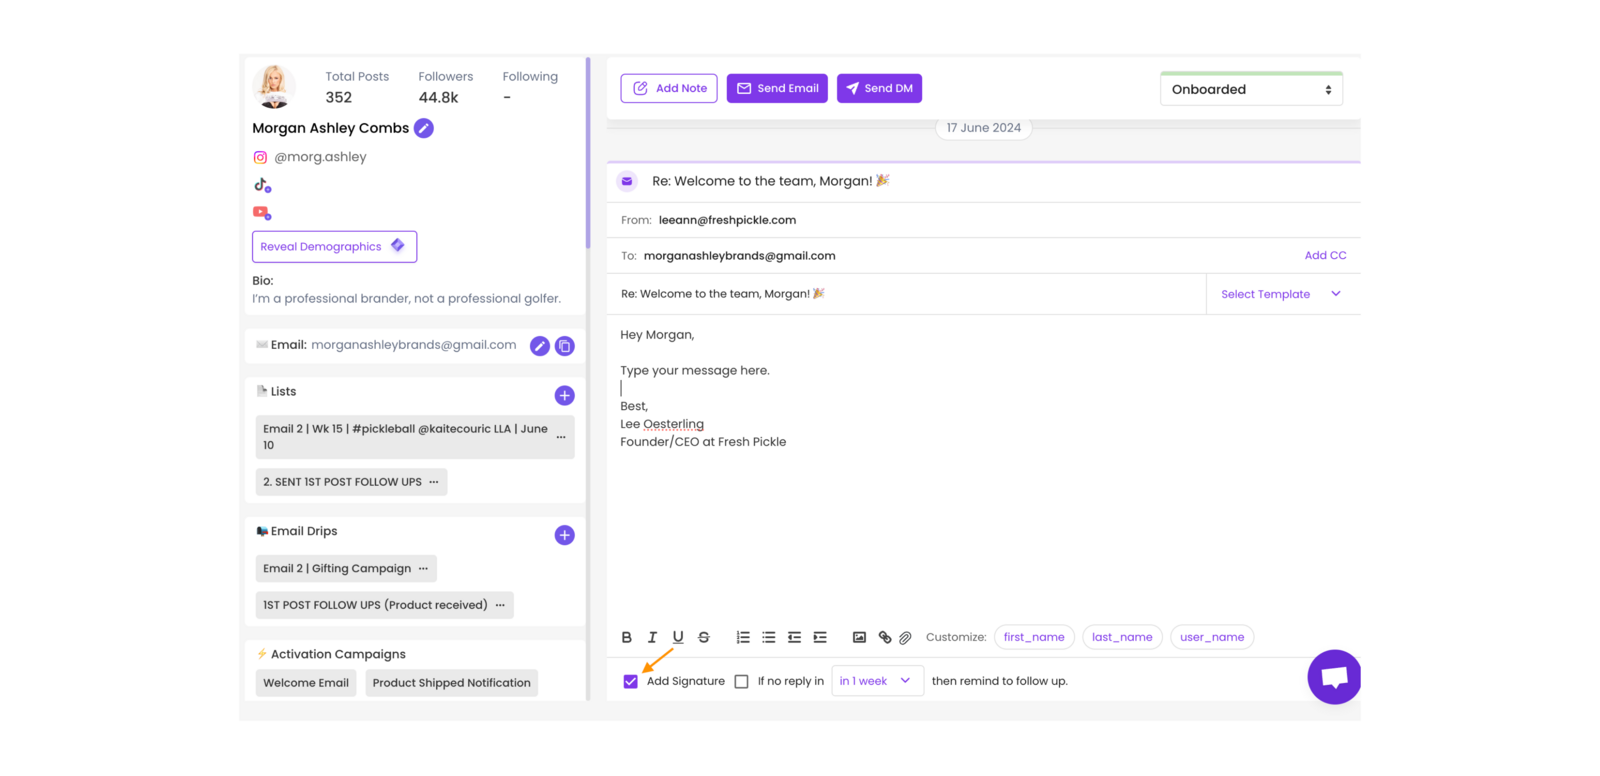
Your linked signature will now be added to your email drips and your individual emails. You will be able to preview your signature by checking the ‘add signature’ checkbox when sending individual emails to influencers.

In SARAL, you can't preview your signature in the Email Drips preview because you can connect multiple inboxes to each email drip campaign to boost your daily sending rate. Rest assured, the correct signature will be attached to your email based on the inbox it is sent from.
Still have Questions?
Reach out anytime via the support chat at the bottom-right corner of your dashboard, or email us at [email protected]. We’re happy to assist!