This is useful when you want to run multiple campaigns (like a “Christmas Sale” or “Product Launch”) and track performance independently for each one.
Go to the Lists section from the left sidebar.
Select the list you want to turn into a campaign.
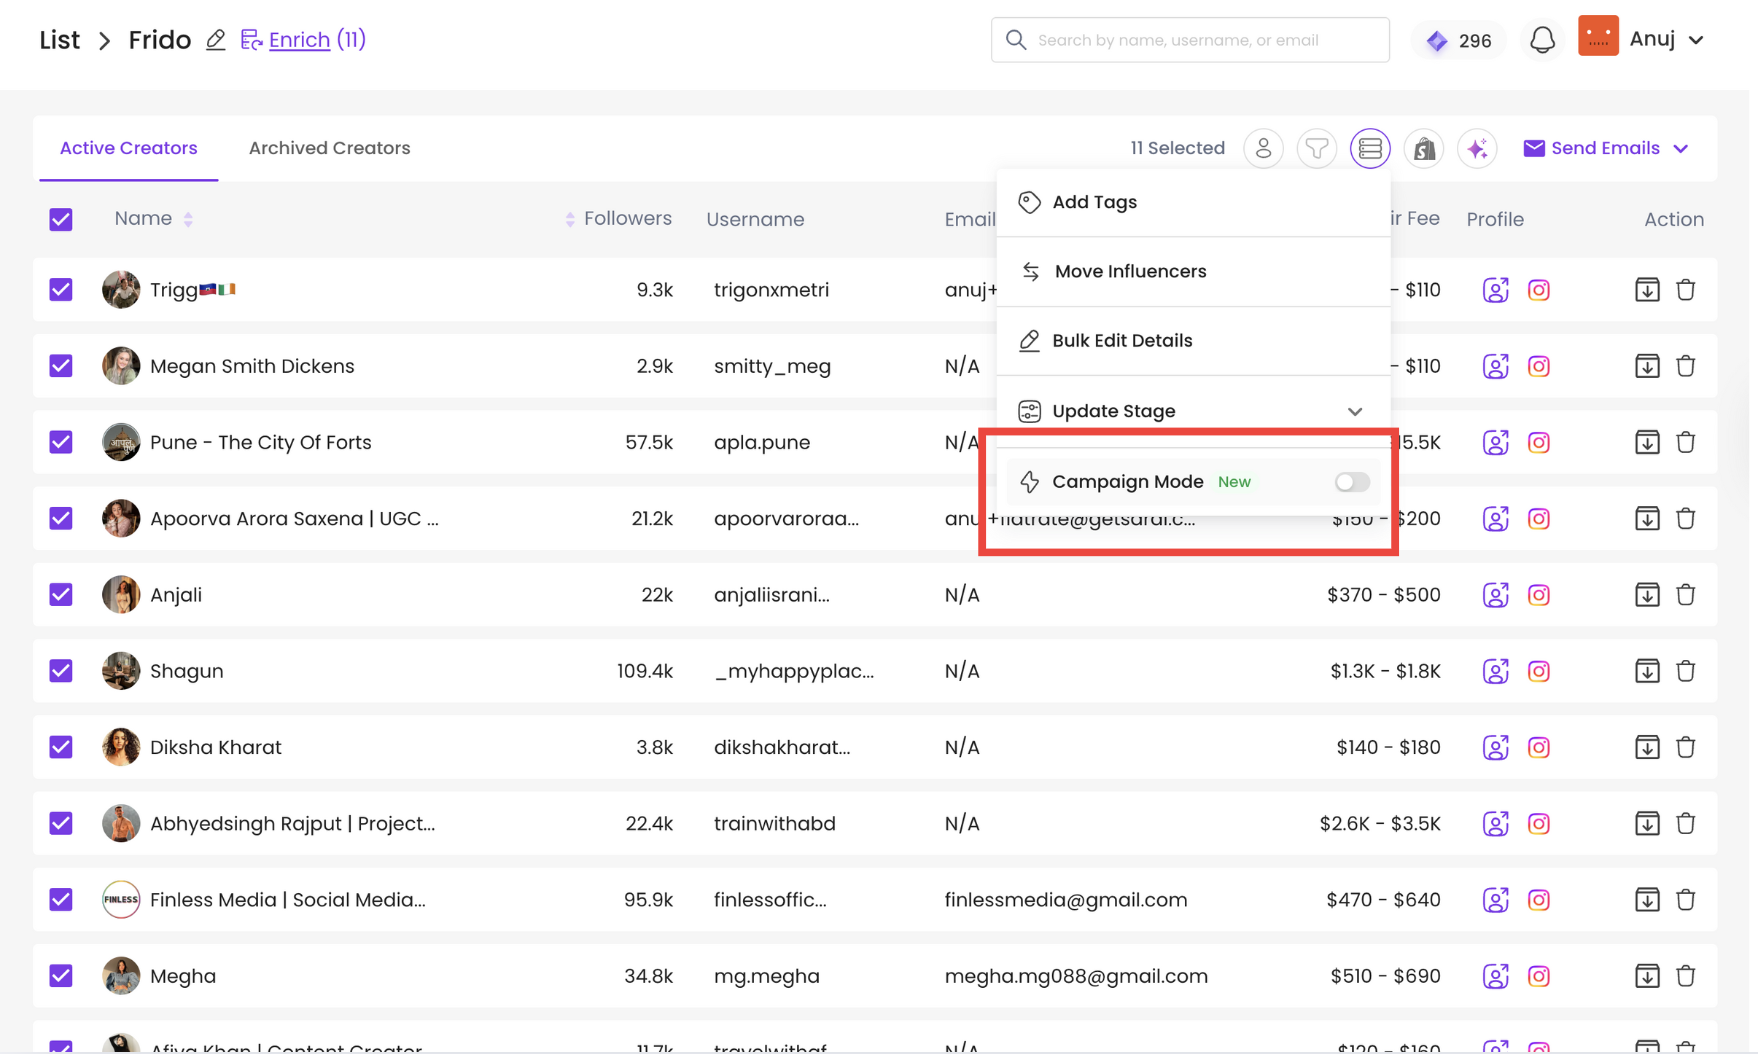
Select the influencers from that list you want to add to a campaign.. Once selected, a bulk-action menu icon will appear on the top-right.
From the menu, turn on the toggle, Campaign Mode to ON.
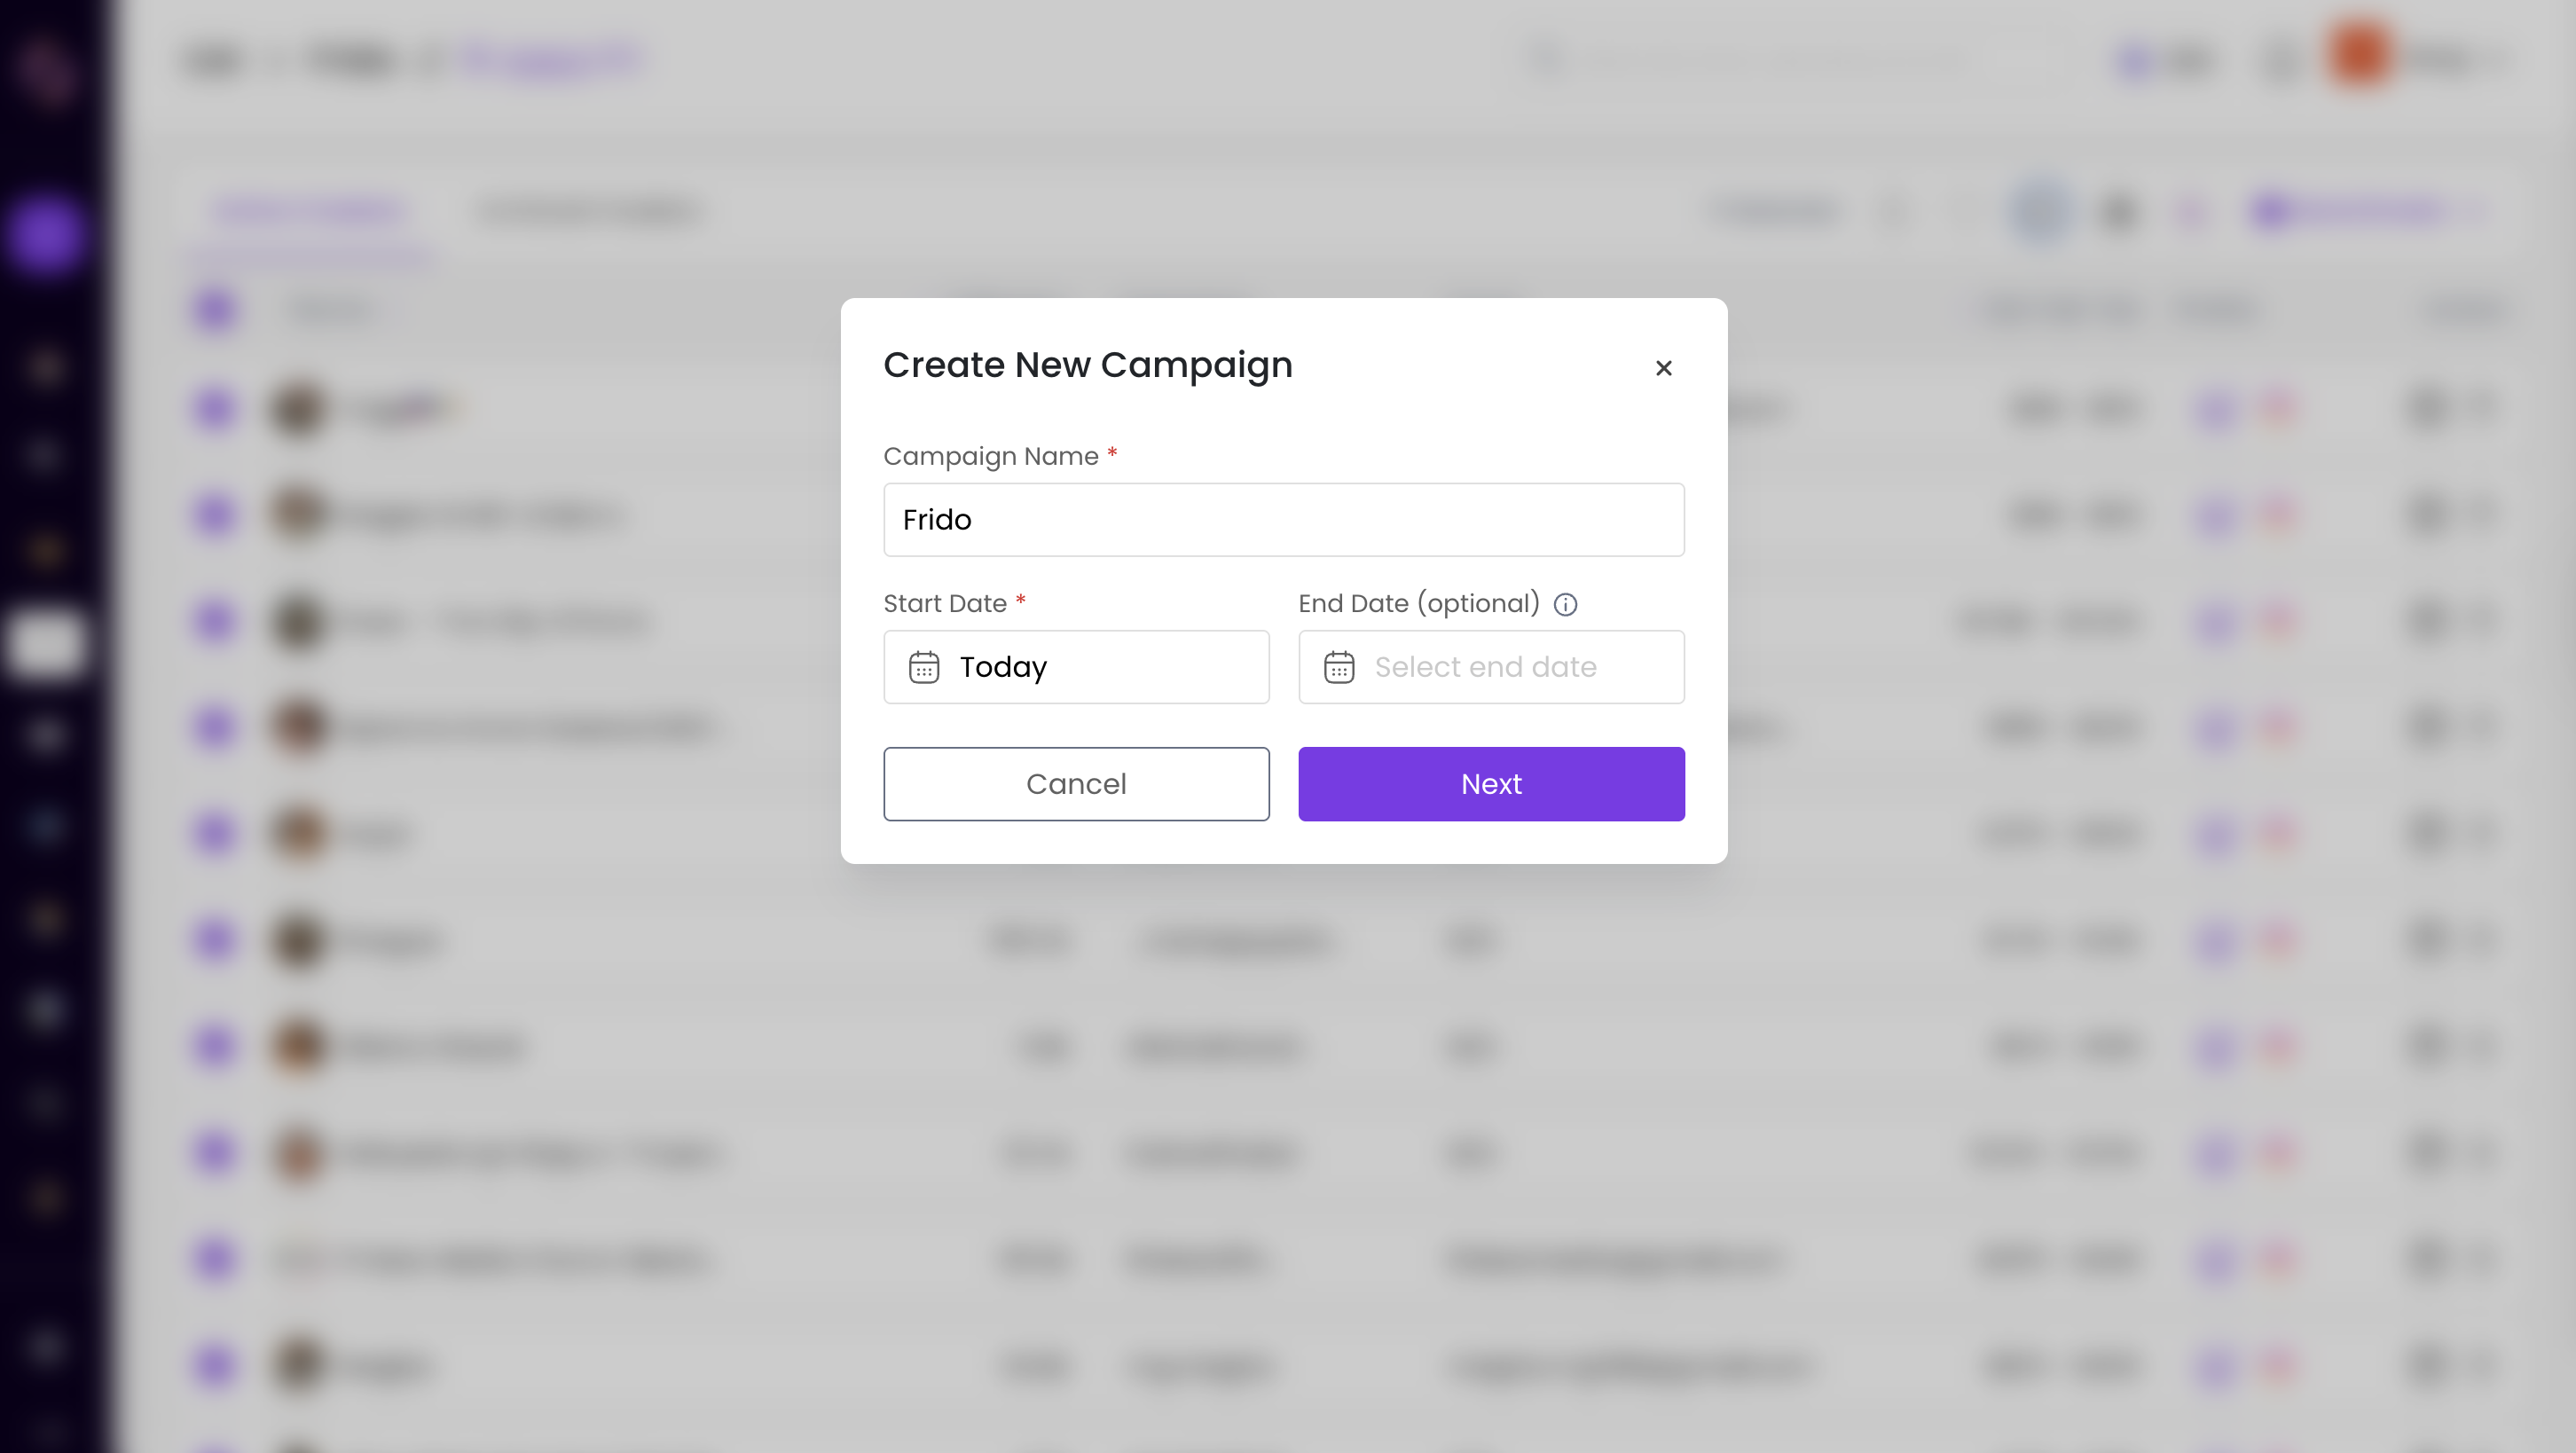
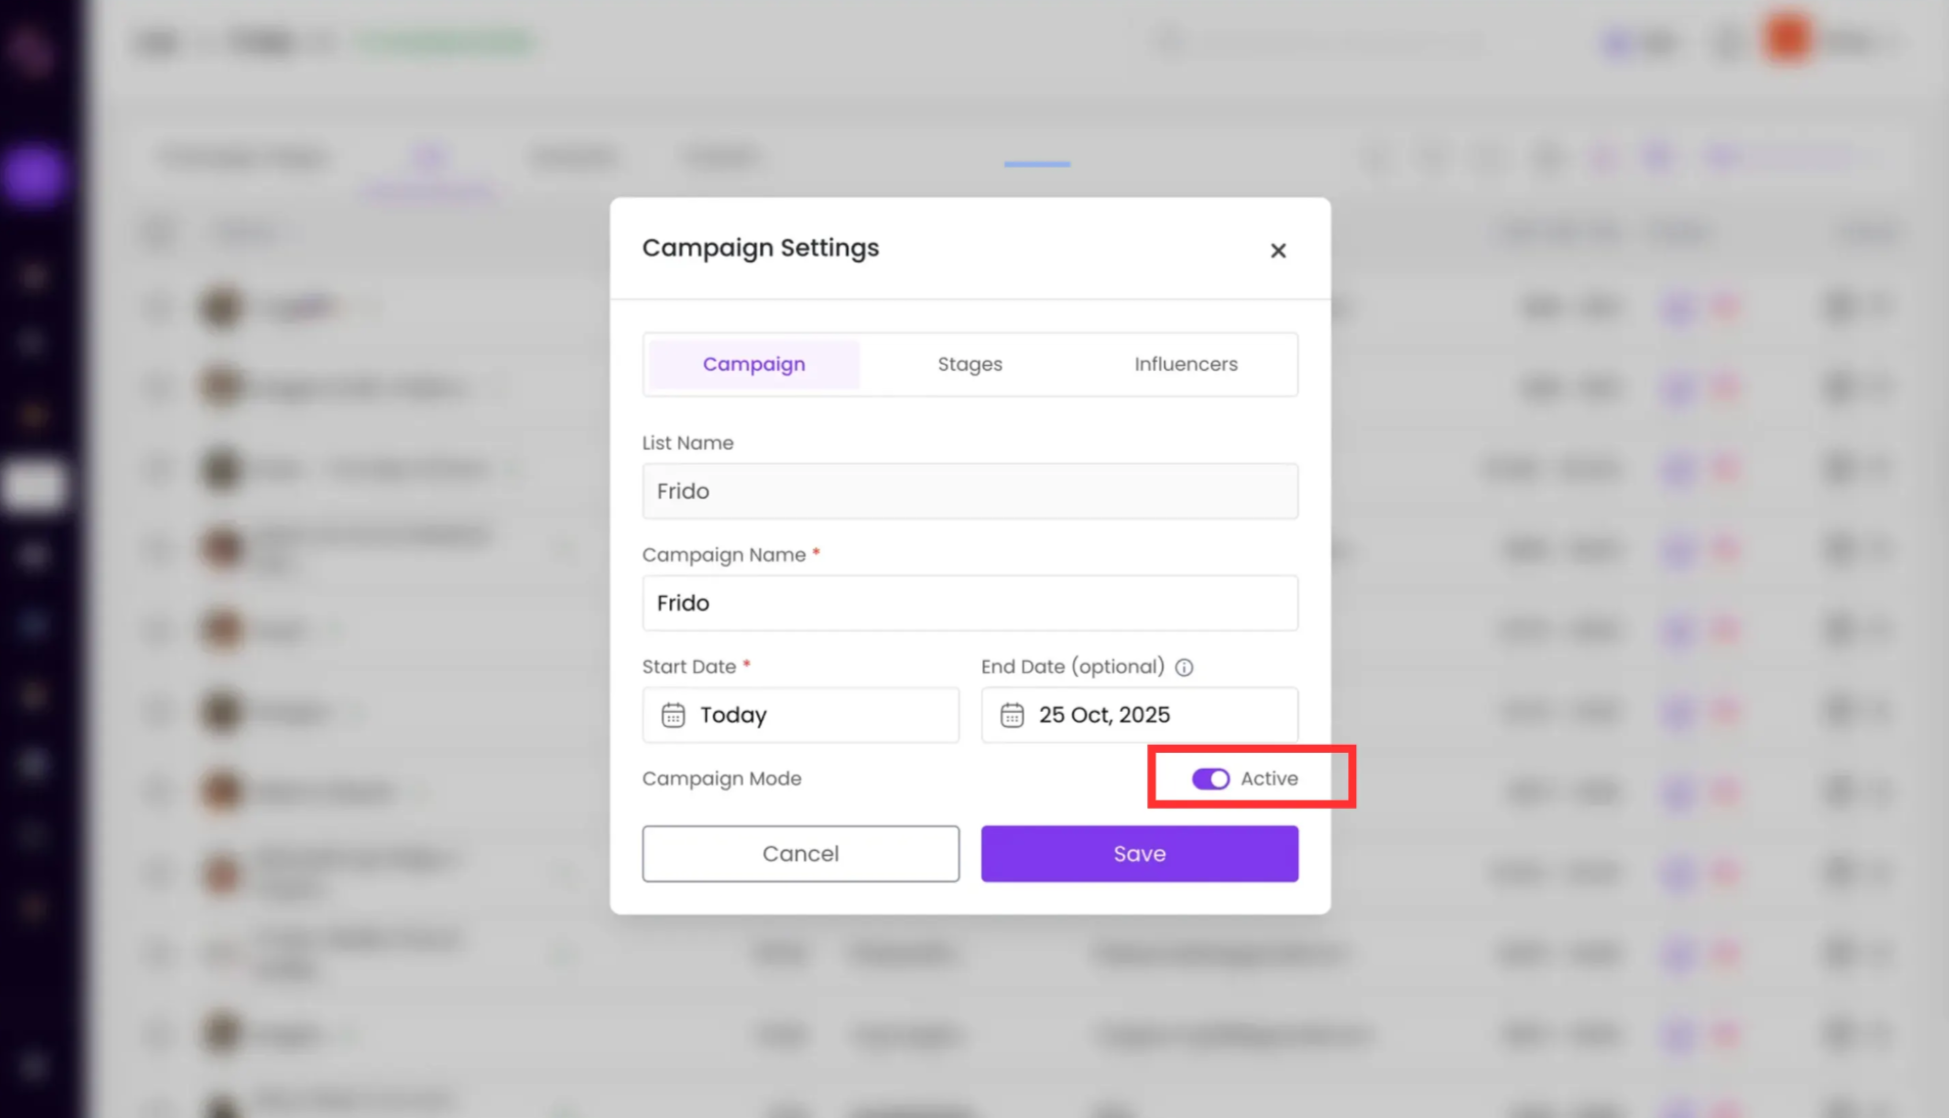
A modal will open to set up your campaign details:
Campaign Name: Auto-filled as the list name (you can edit it)
Start Date: Add your start date.
End Date: Optional
Click Next to continue.
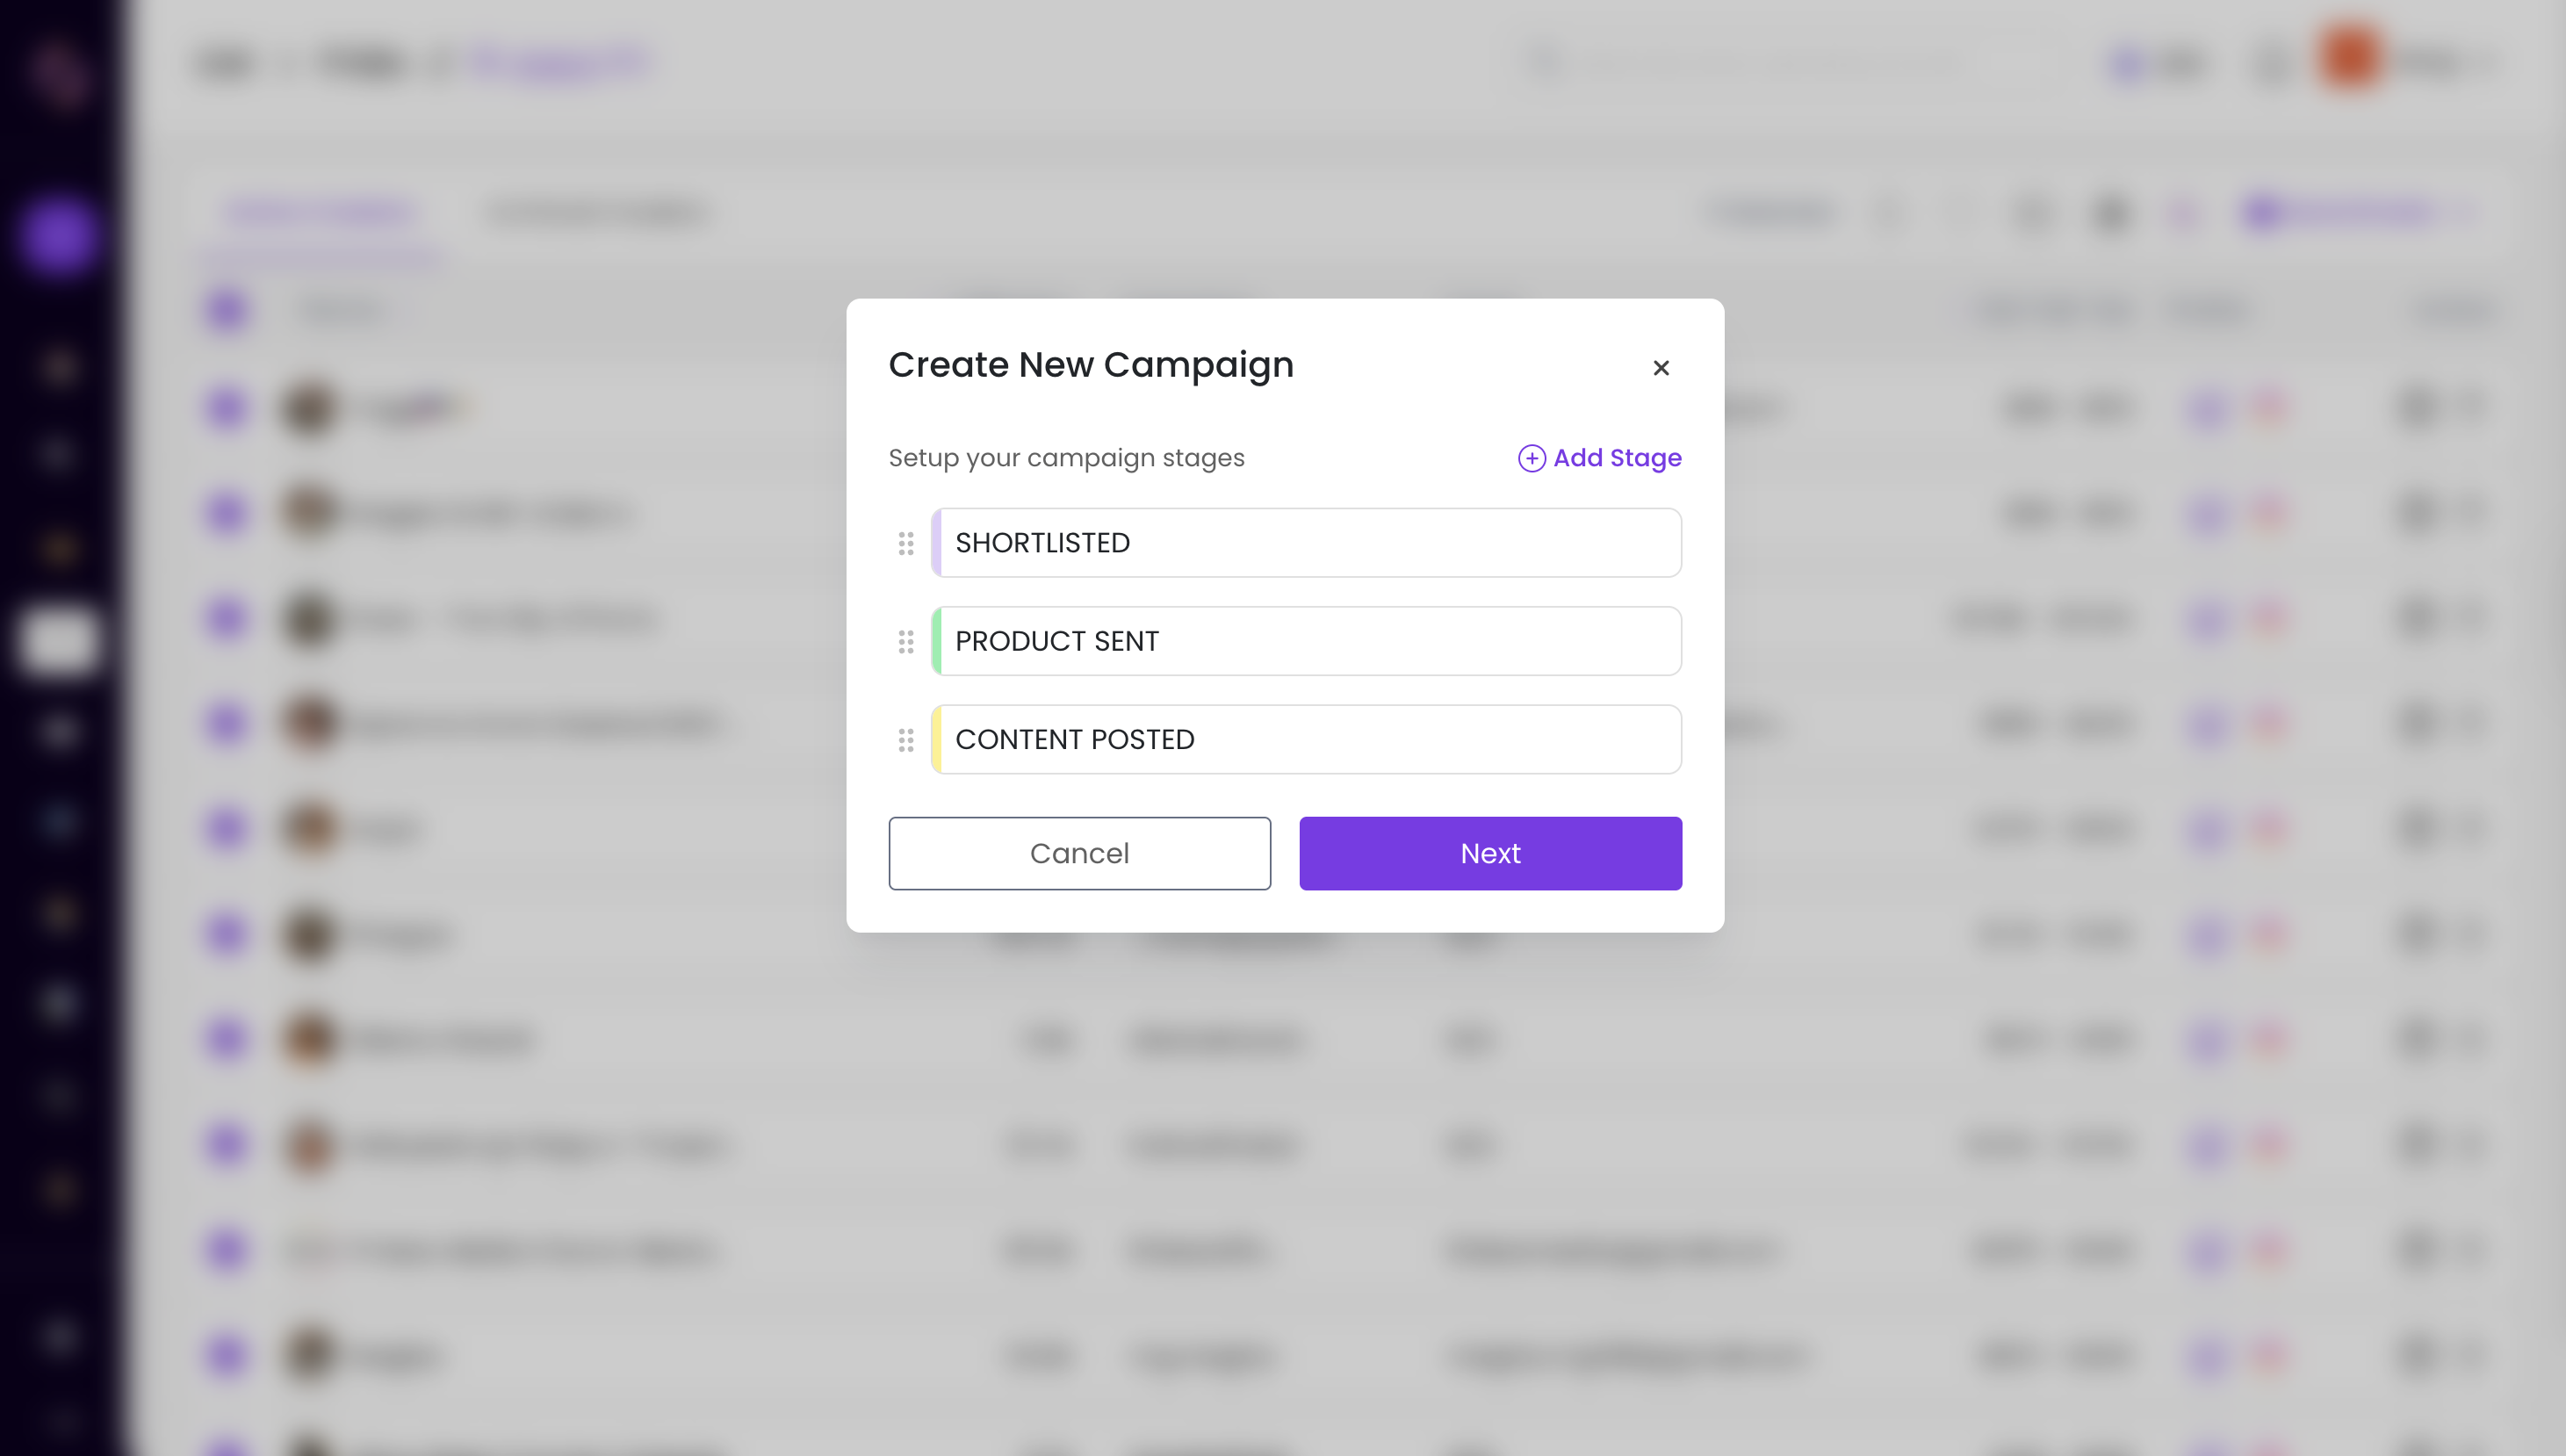
You will now see three default stages:
Shortlisted
Product Sent
Content Posted
You can rename or reorder these stages and add new ones if needed, eg: "Content Approved", or "Payment sent"
A minimum of three stages is required to proceed.
Click Next to review influencers.
Review all selected influencers before creating the campaign.
You can remove anyone you don’t want to include or view their profiles to confirm.
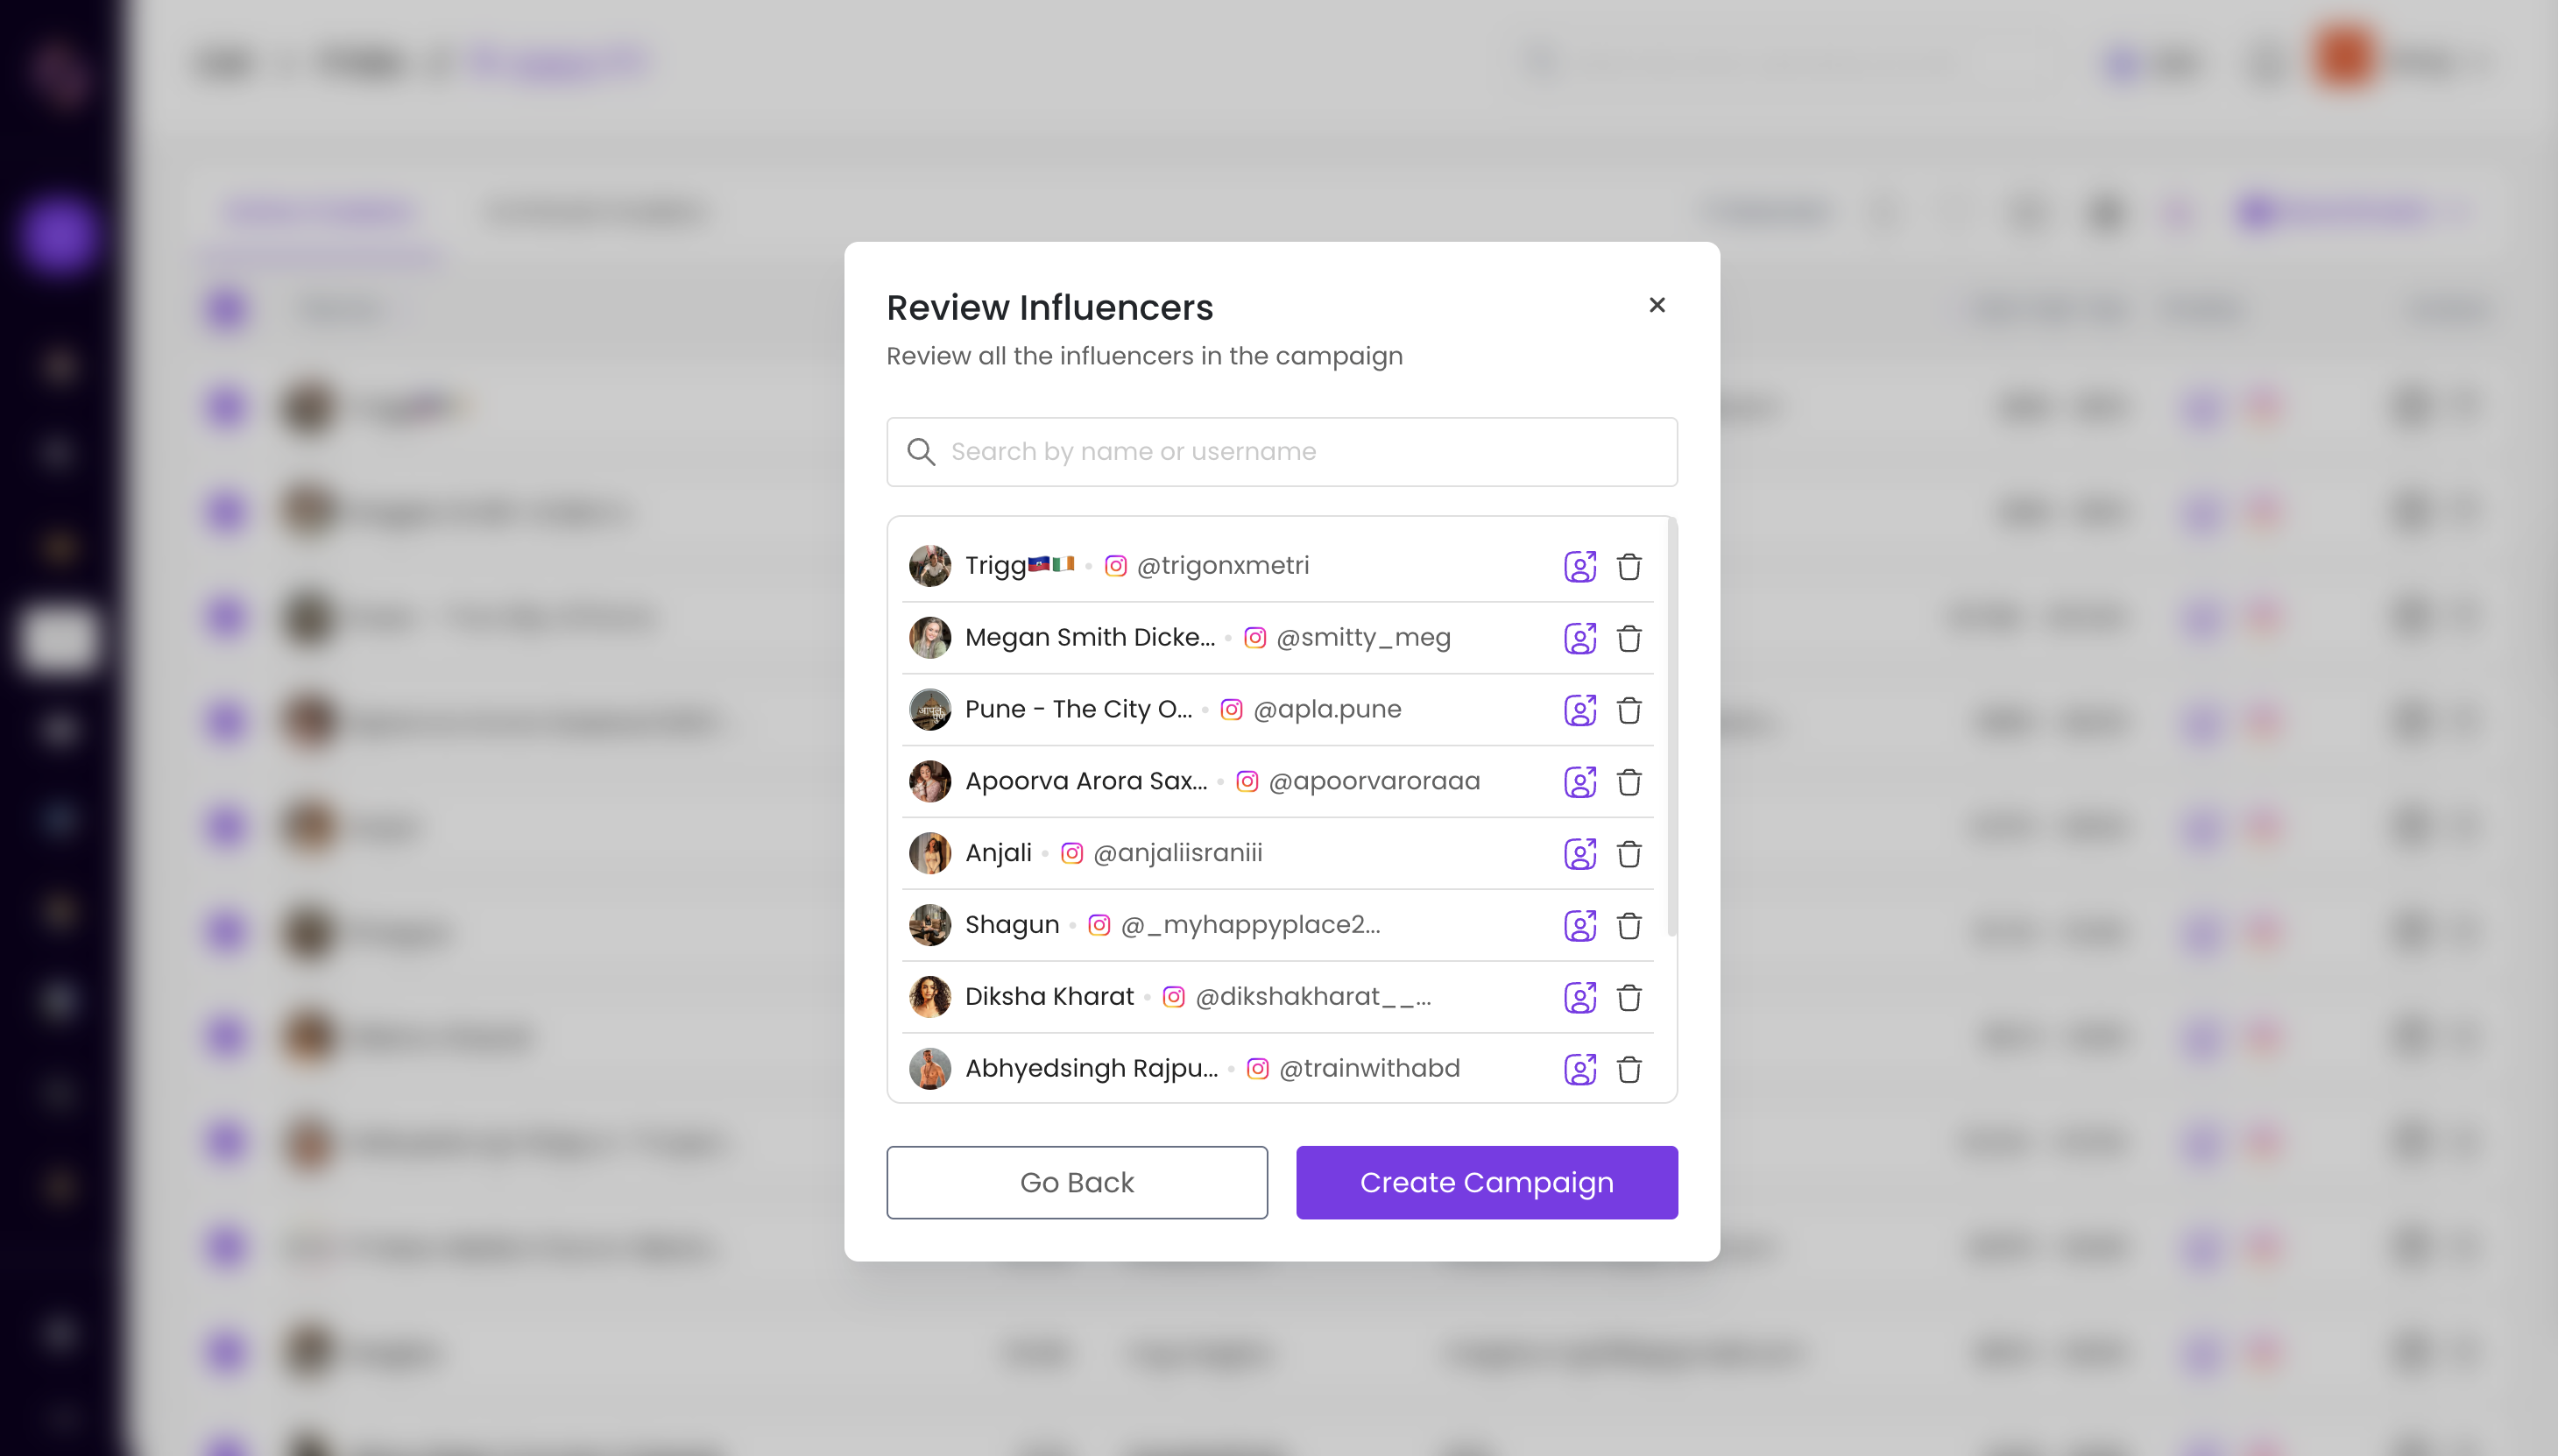
Click Create Campaign to begin the campaign..
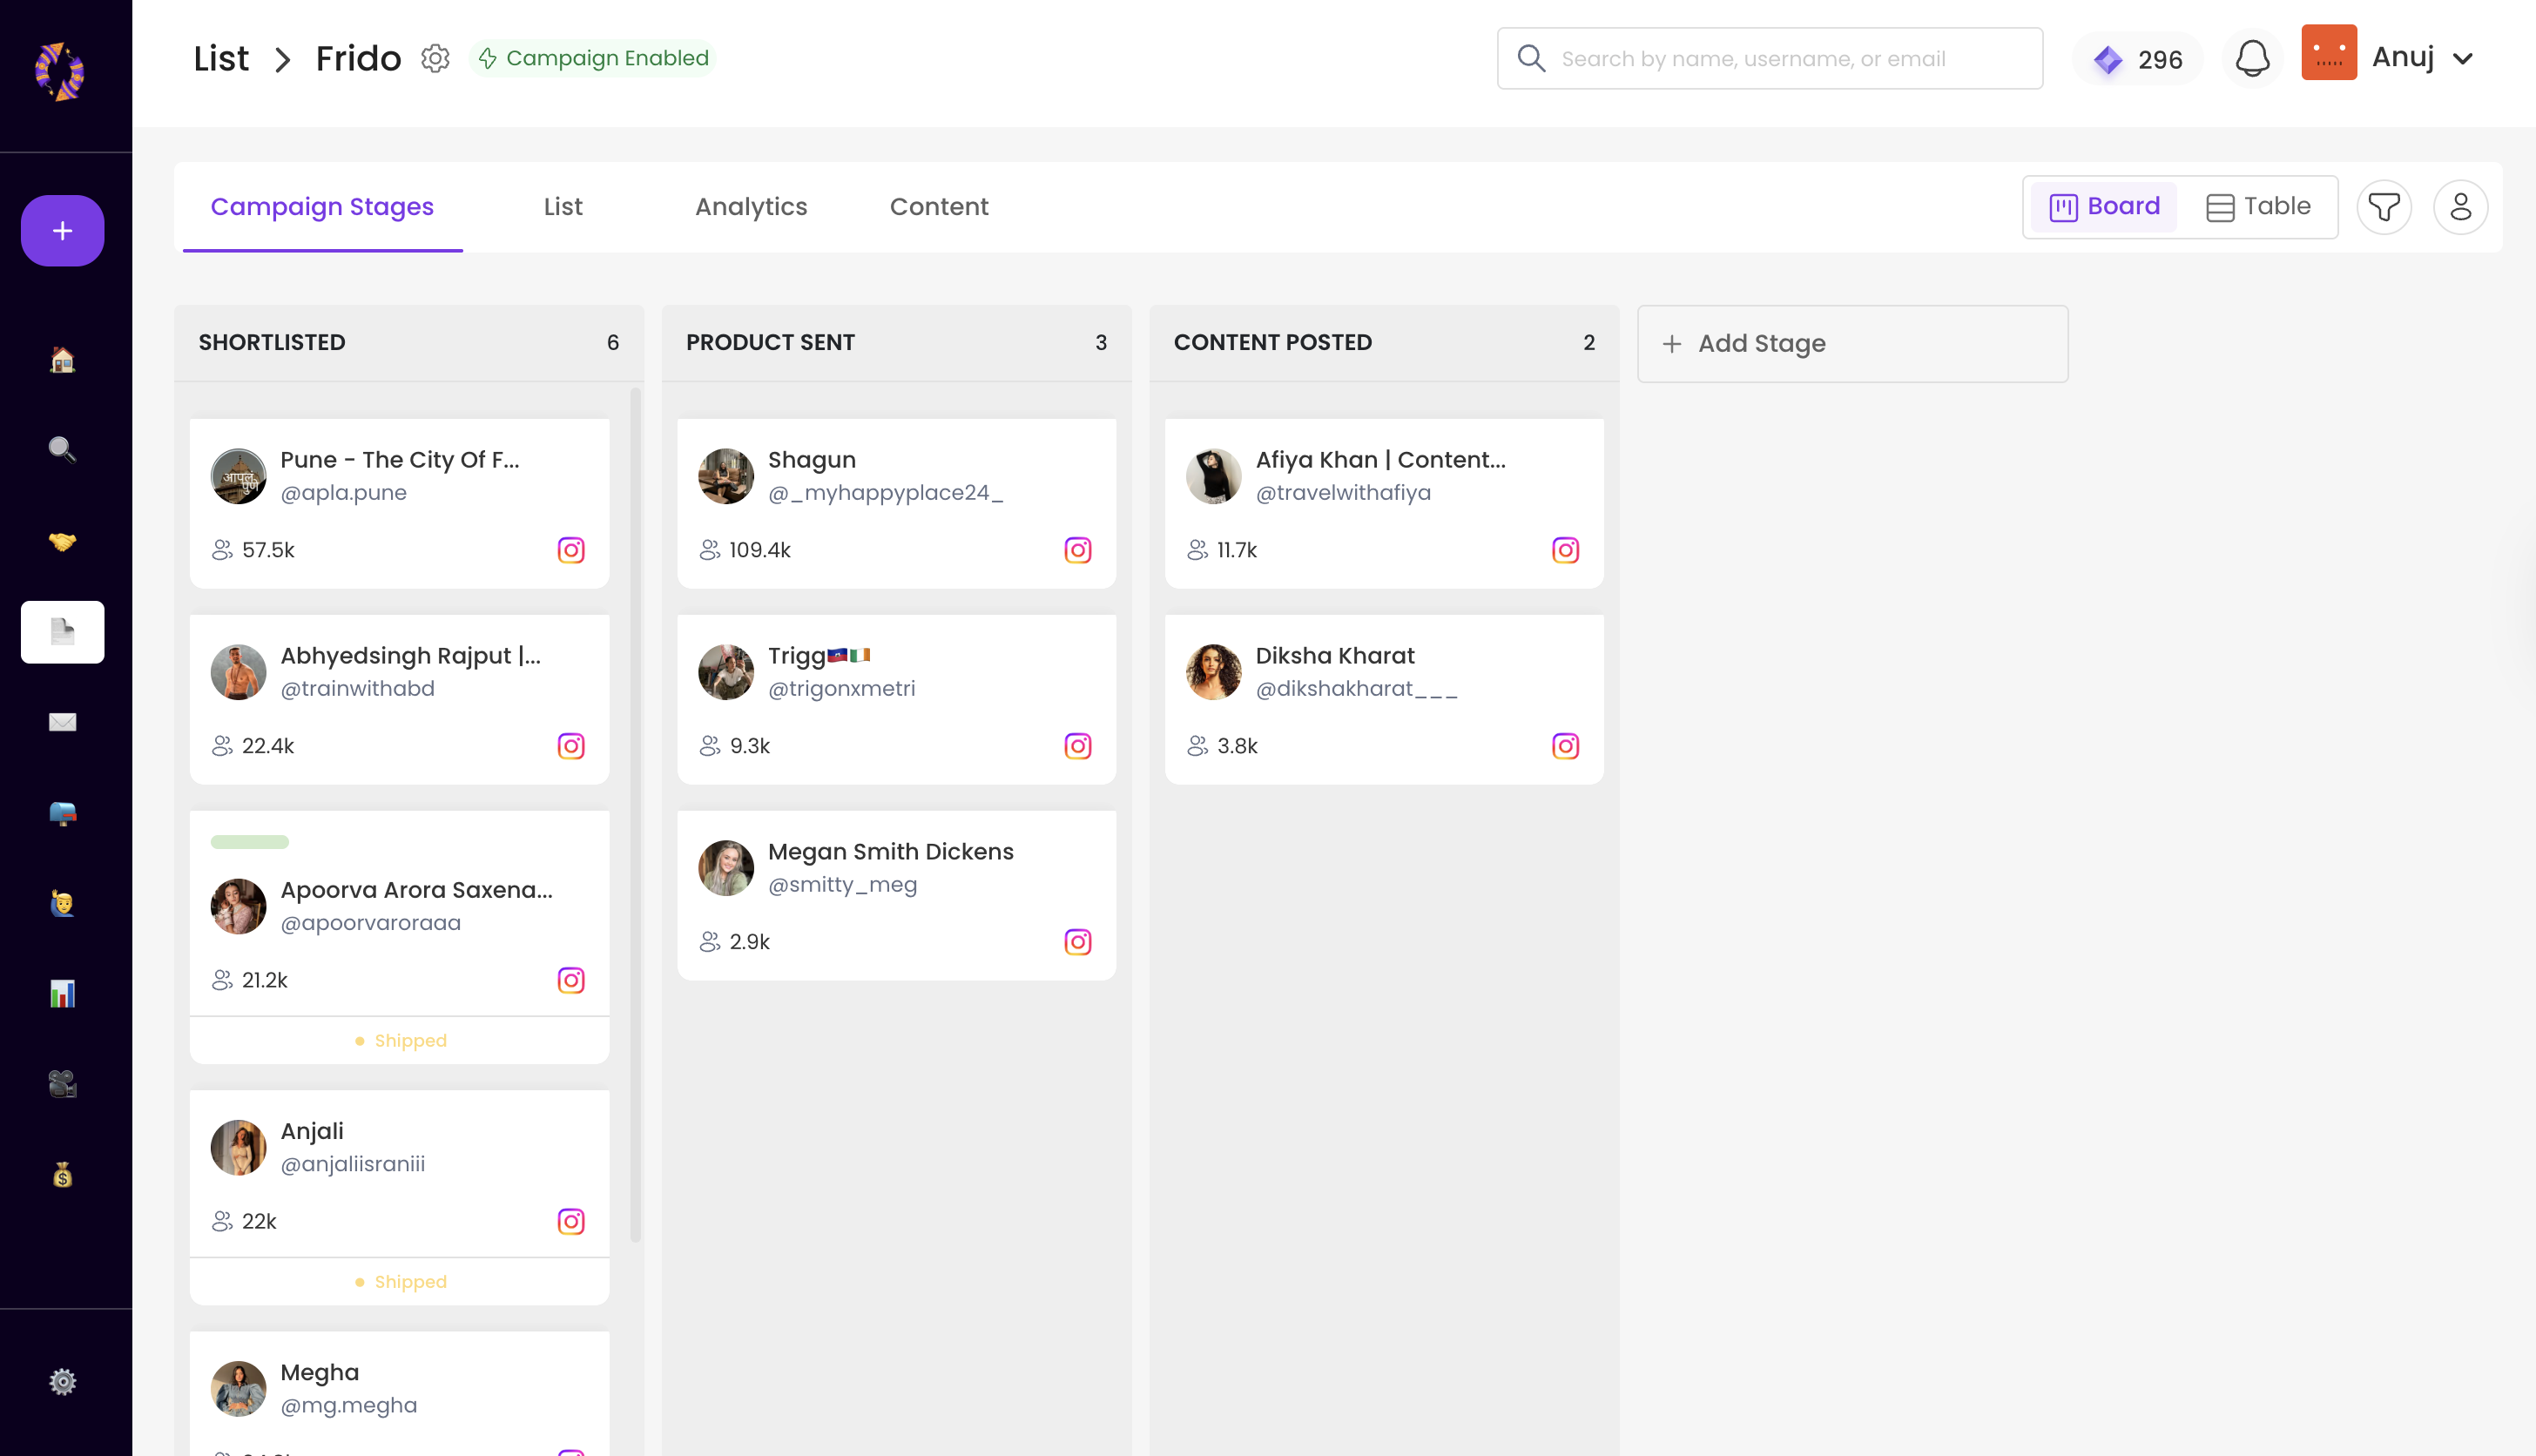
After enabling, your list view will show four tabs:
A Kanban-style board with all stages visible as seen in the image below. You can drag and drop influencers across stages or switch to Table View as per your preference.
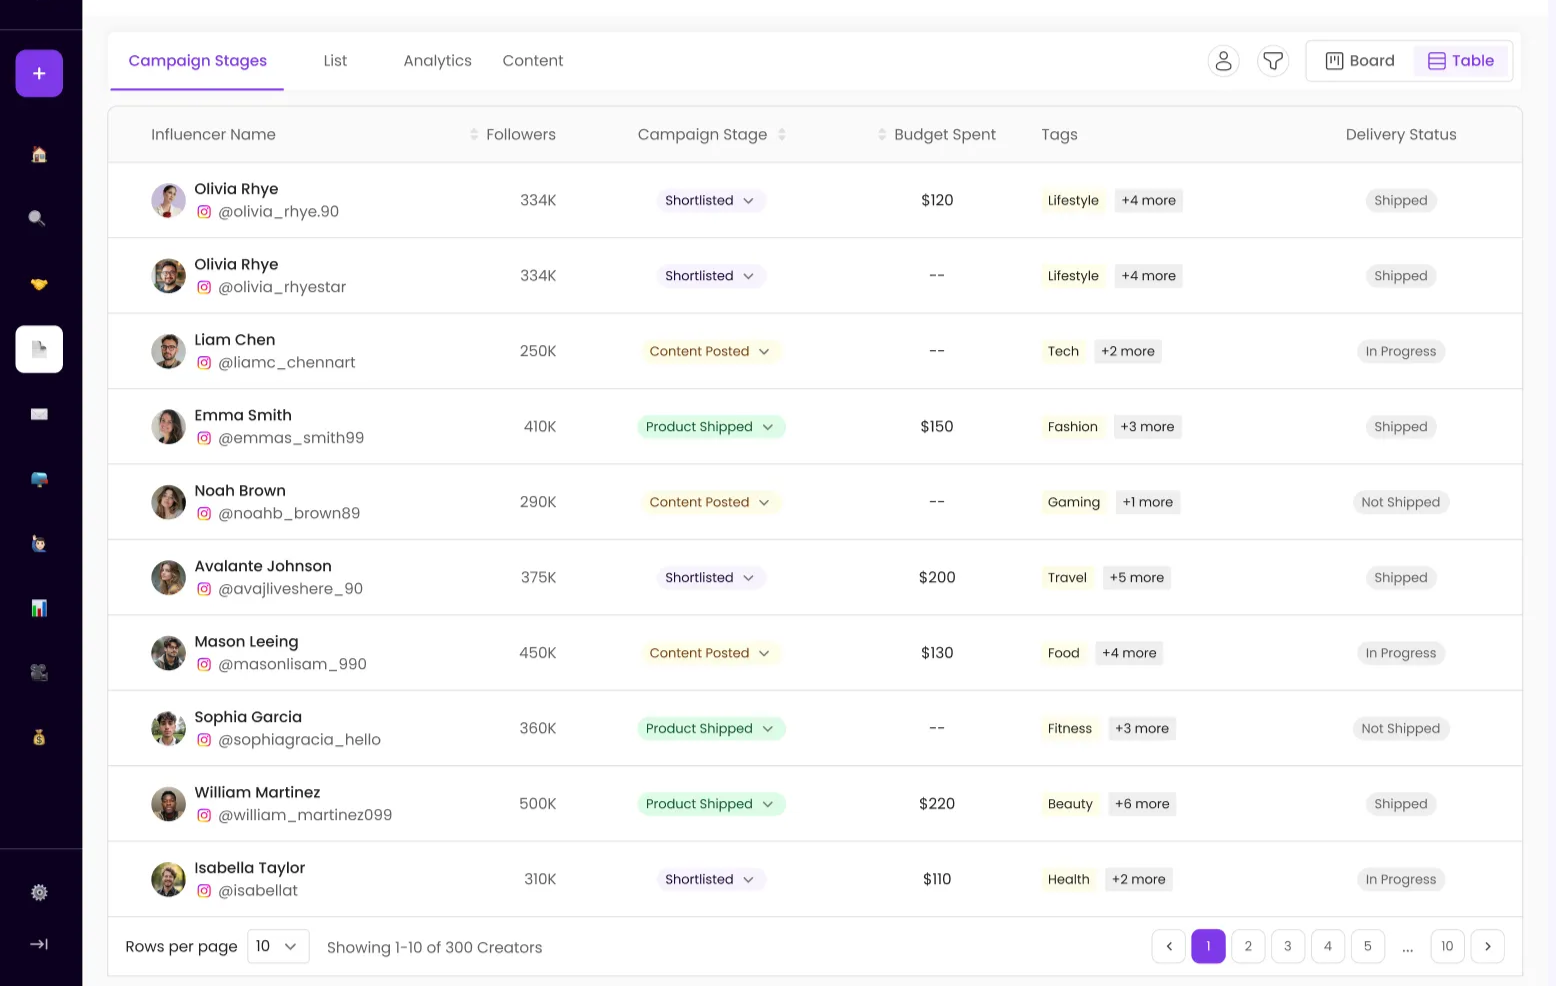
In Table View, you’ll find a Budget Spent column— click on the respective influencer row under the Budget Spent column to manually add how much you’ve spent per influencer.
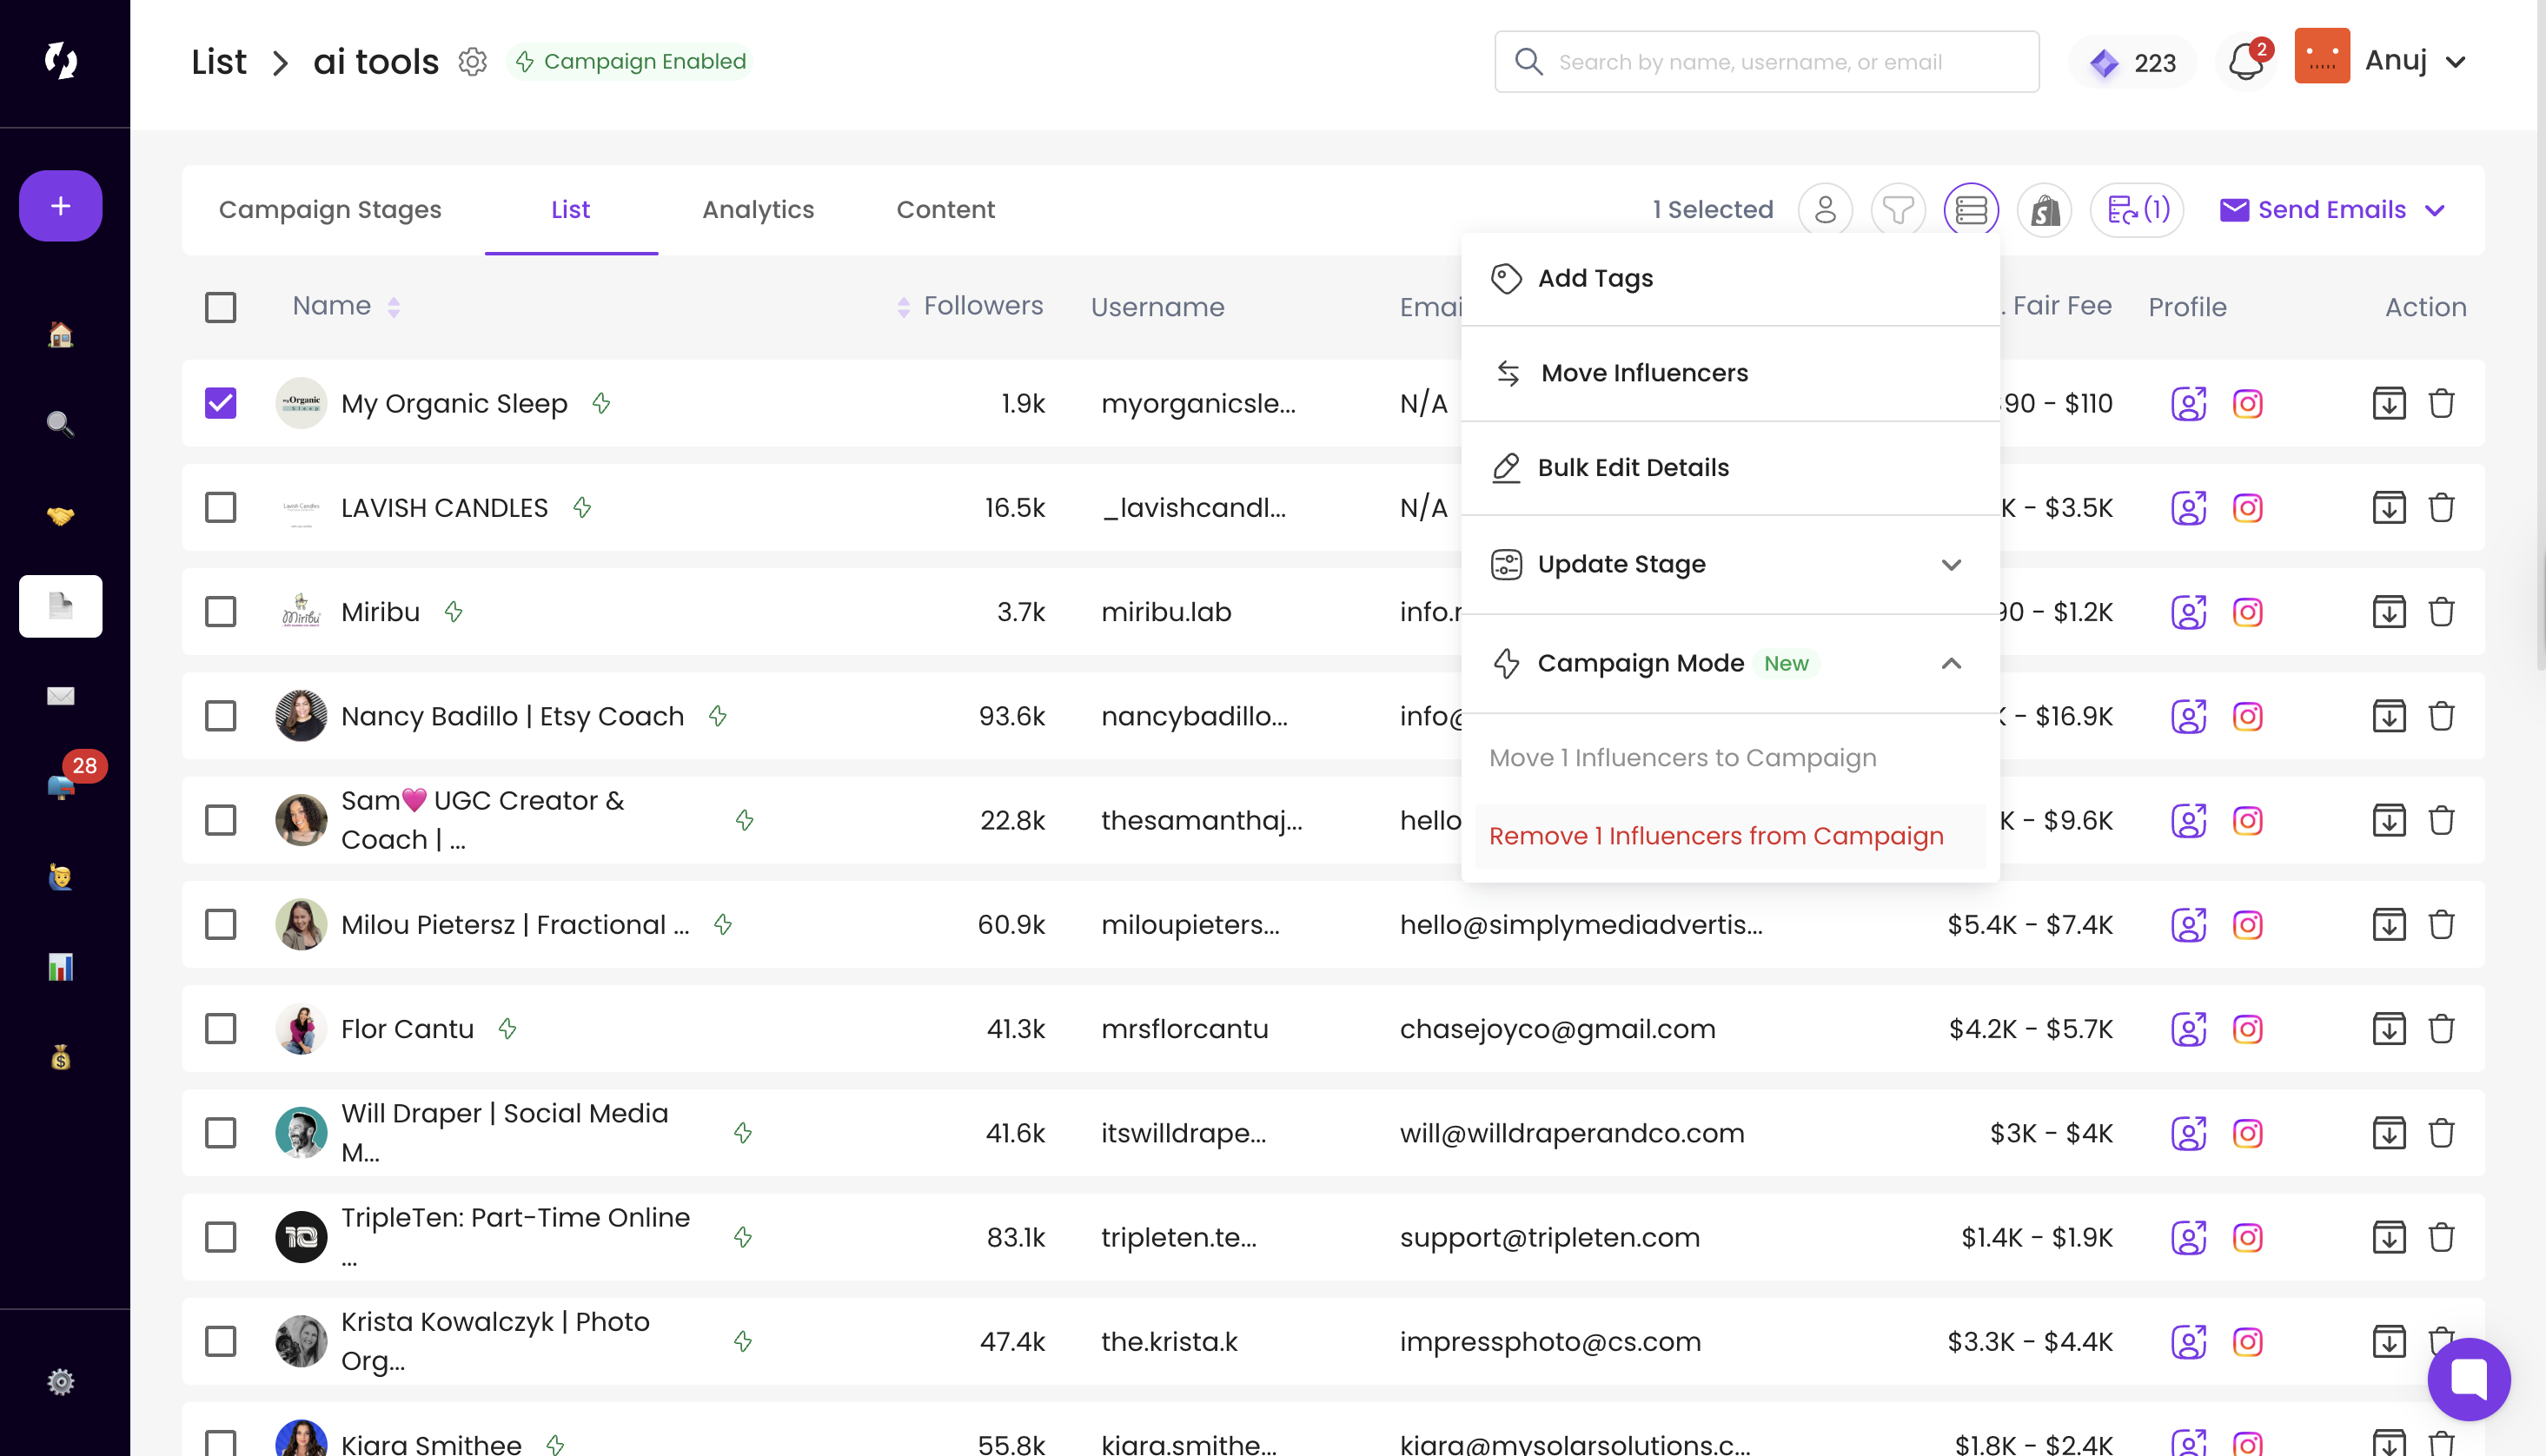
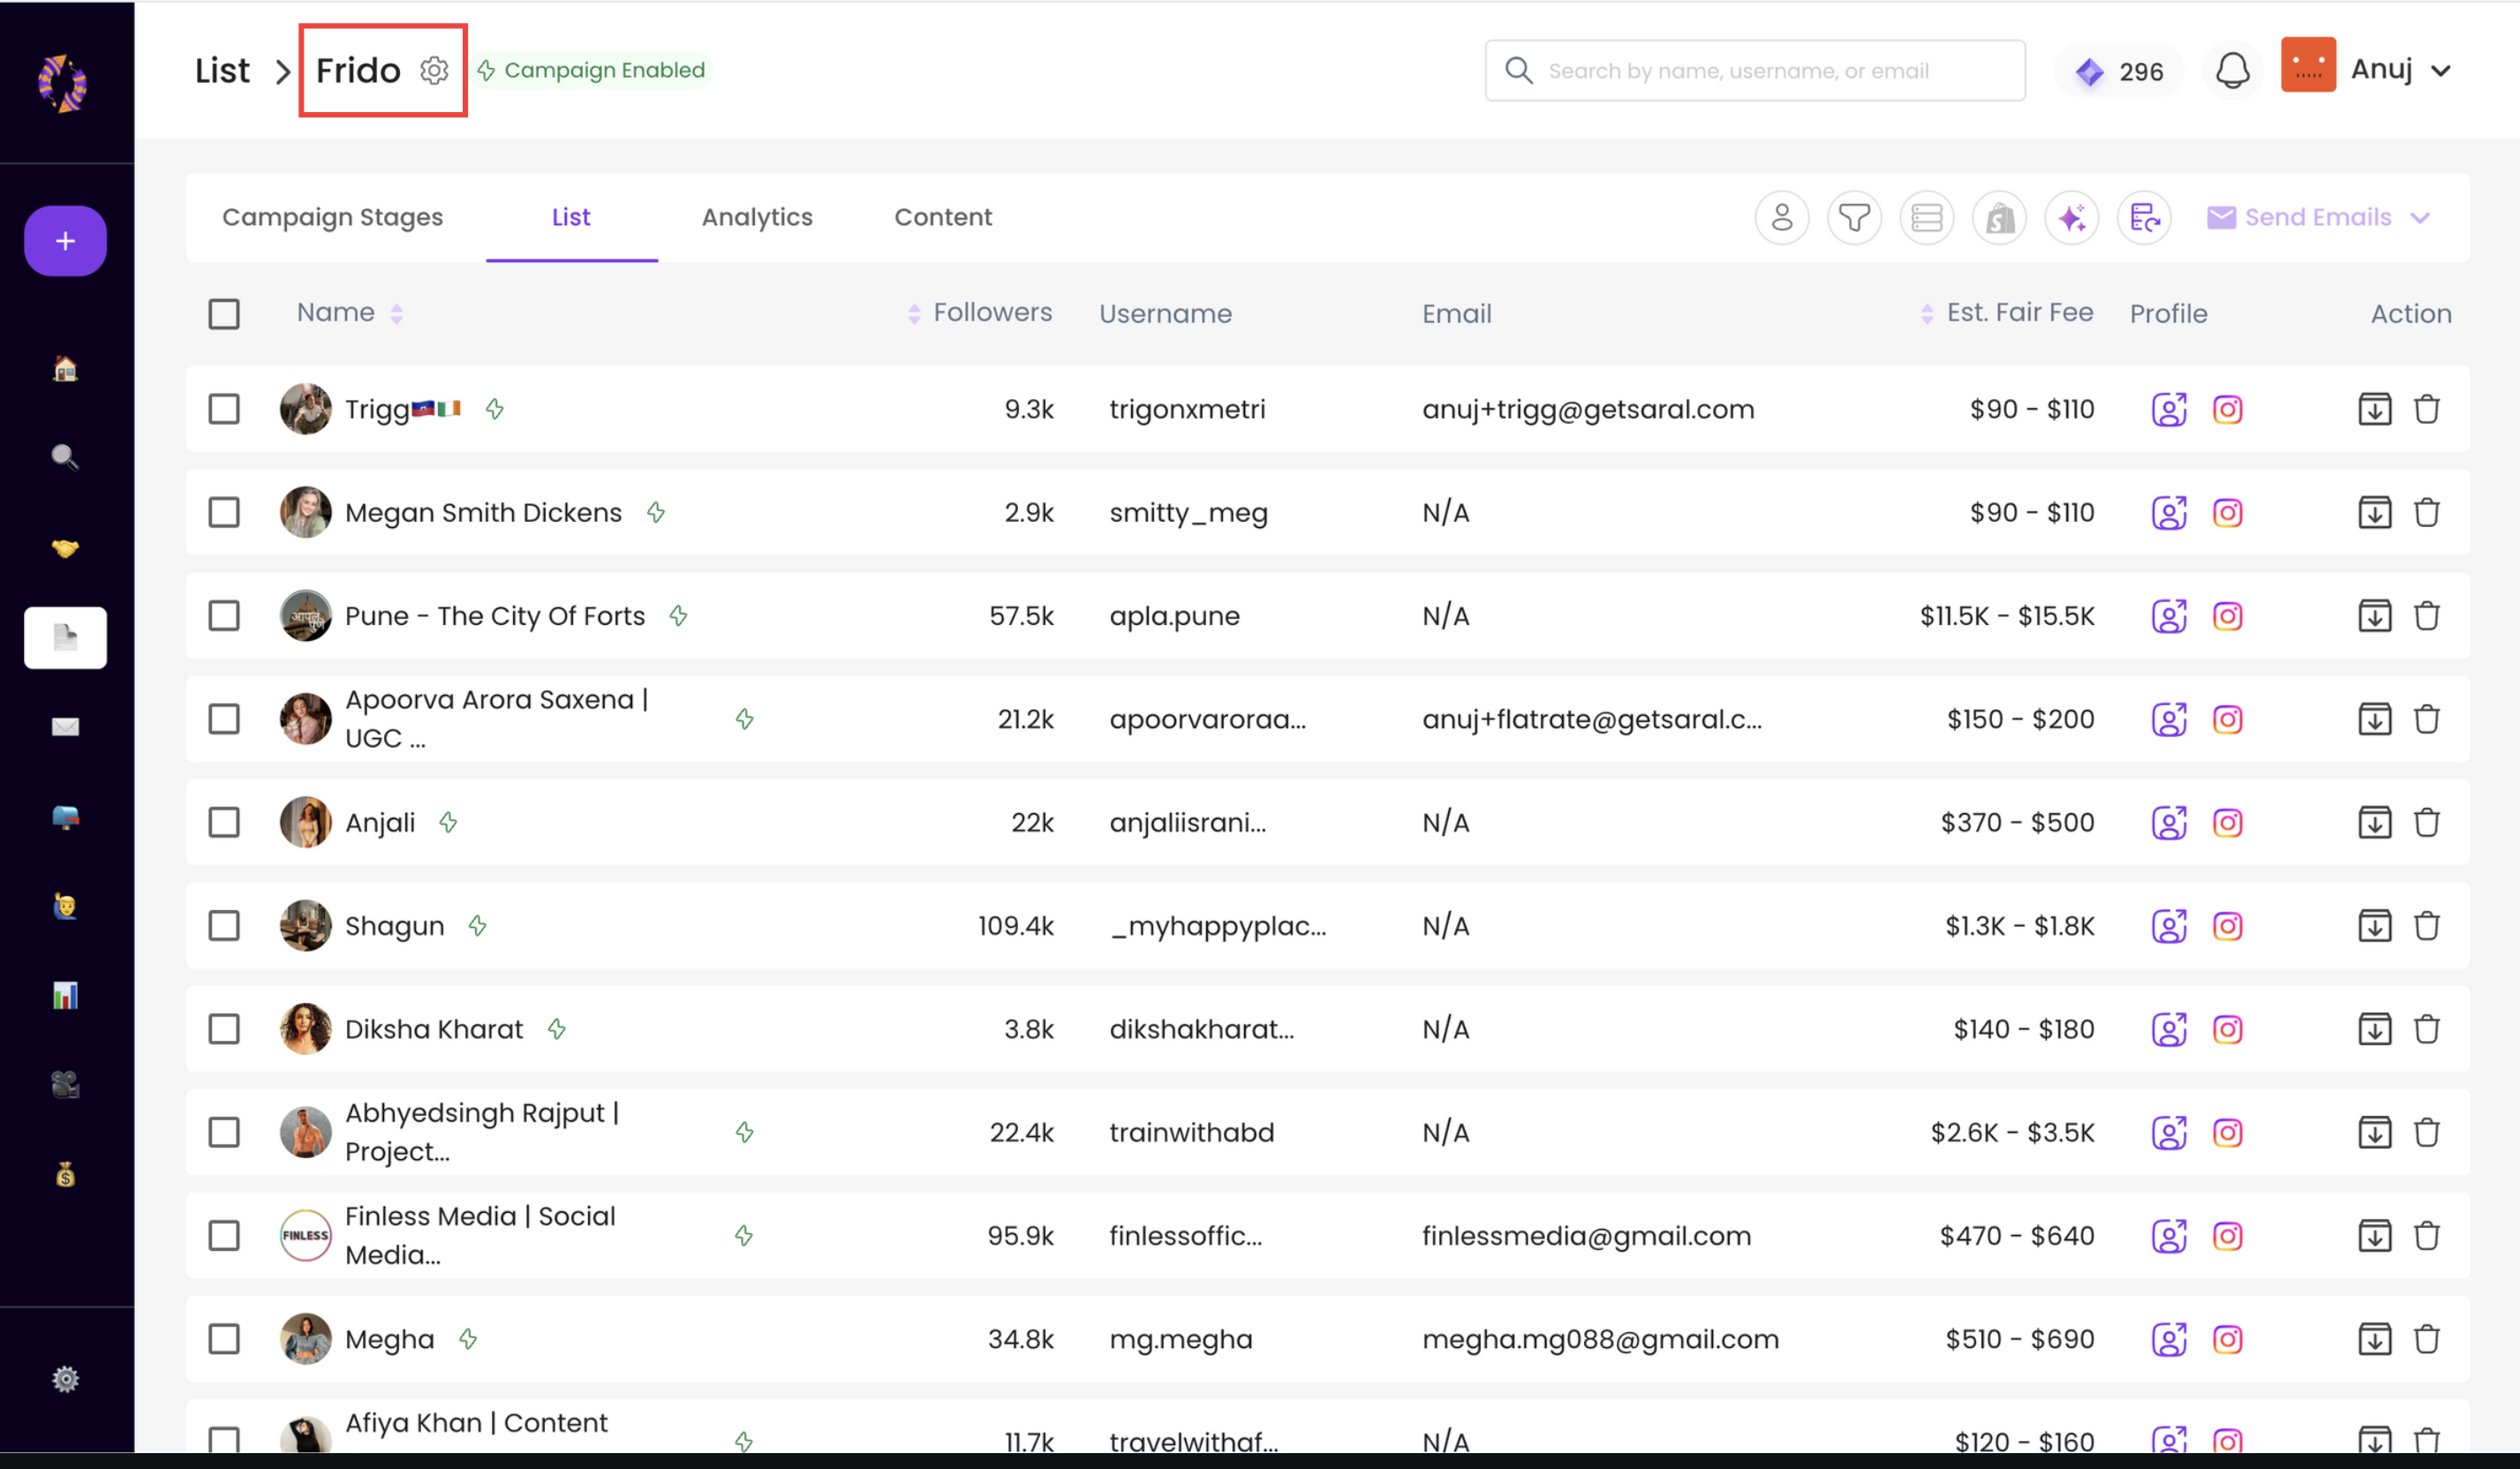
The List Tab displays all influencers added to this campaign, along with follower count, username, email, and estimated fair fee.
From here, you can remove influencers from the campaign by selecting the influencer/s. Click on Bulk Actions —> Campaign Mode, and a dropdown opens with the option to remove the influencer/s.
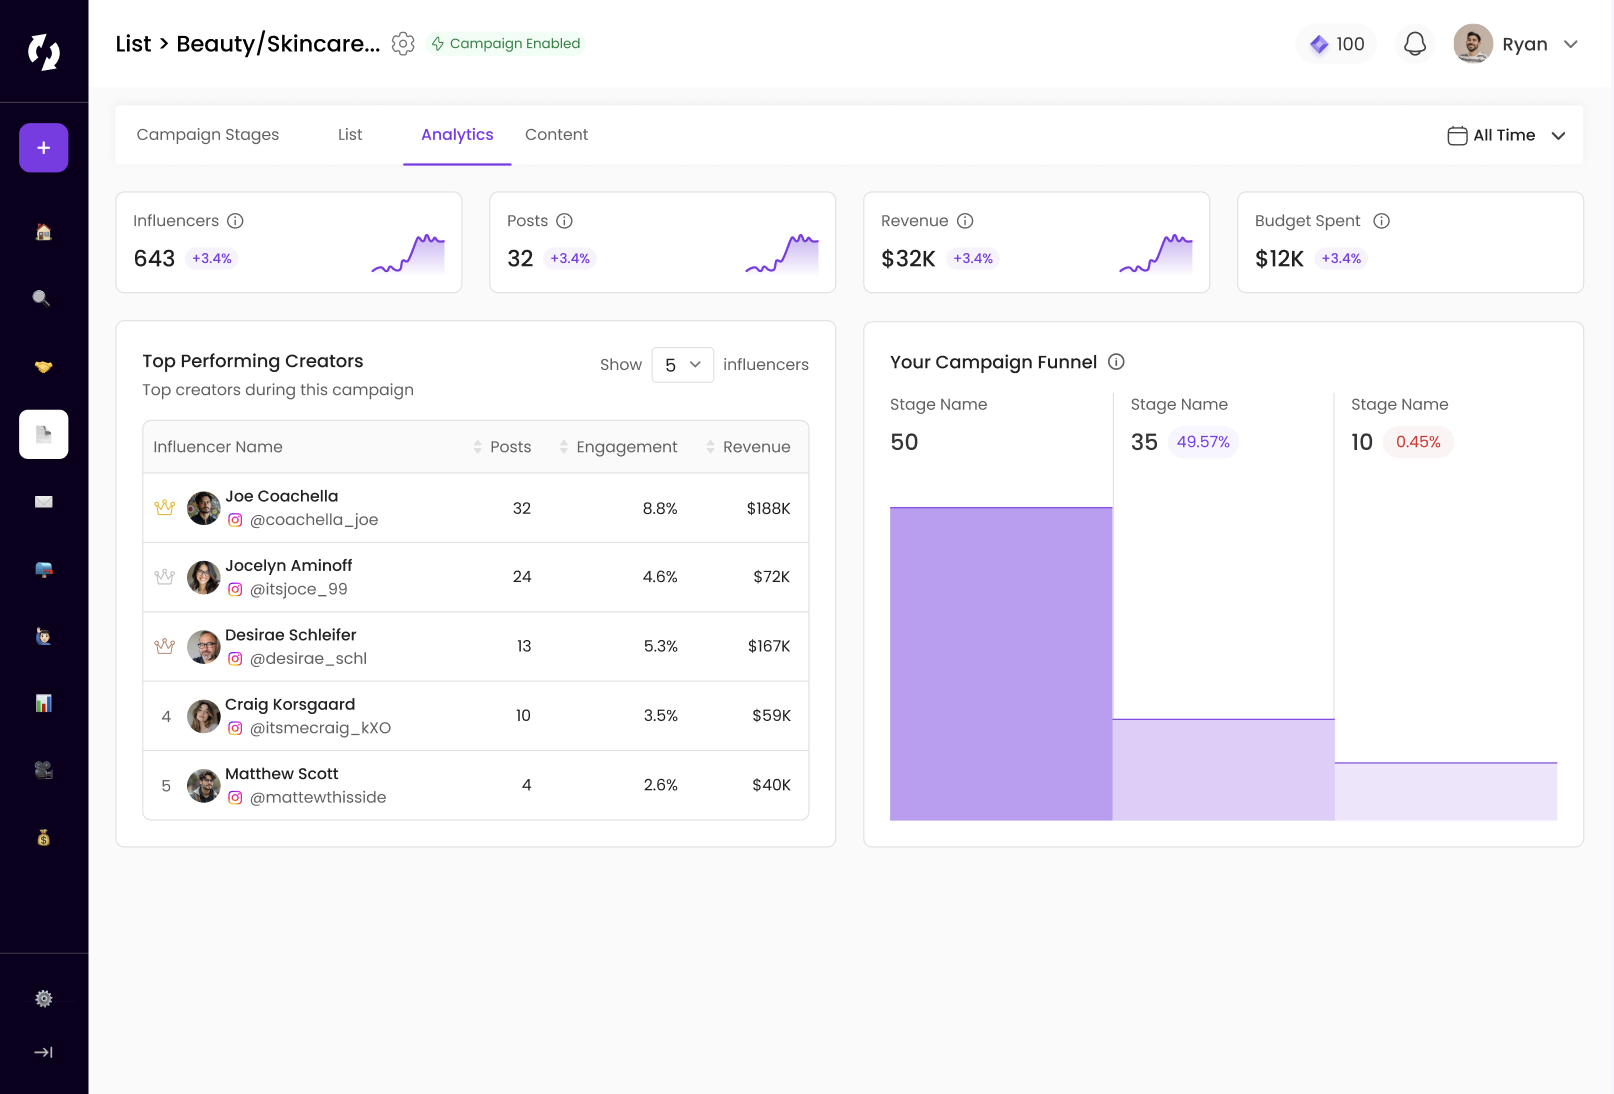
The Analytics Tab shows real-time campaign metrics:
Influencers: Total influencers in the Campaign
Posts: Number of posts logged (or tracked by PULSE)
Revenue: Total campaign revenue
Budget Spent: Added manually from the Table View, this is the budget spent on the Influencers.
Top Performing Creators: Shows top performing creators of your campaign ranked by revenue, engagement rate.
Campaign Funnel: Shows the funnel breakdown across stages, so you can see dropoffs and optimize
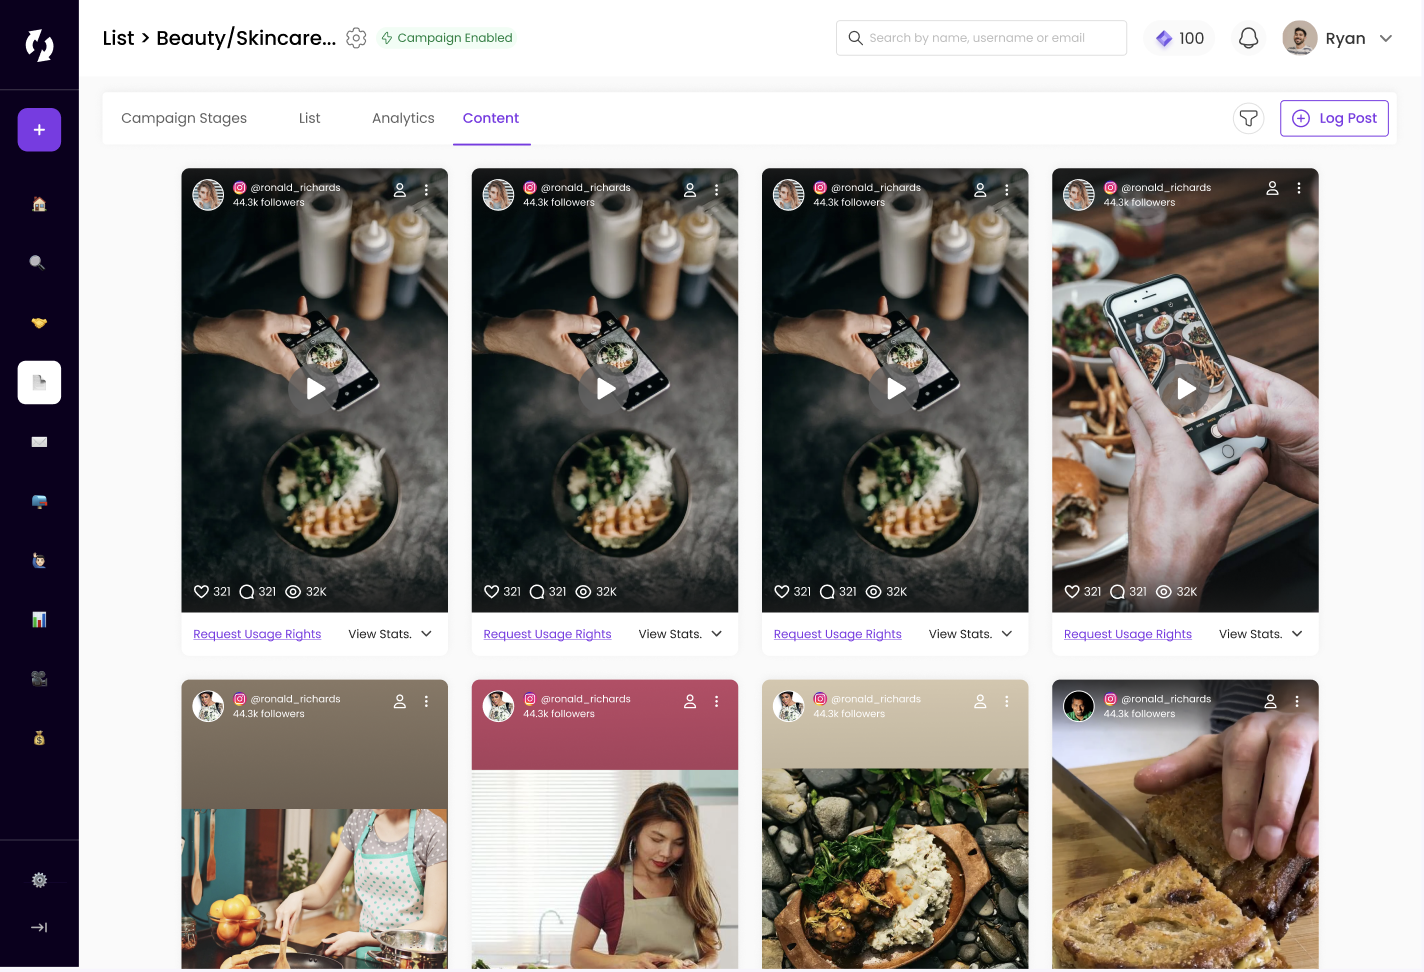
Content Tab let’s you log and track content posted by influencers.
Click Log Post to manually add:
Post or Story Link and Posted Date, or
Upload Screenshots (up to 4) and select who posted them
This is how the Content tab will look like after you log the posts:
If you set an End Date during campaign creation (Step #1), your campaign will automatically move into a view-only state once that date passes.
You’ll still be able to view stages, analytics, and logged content— but can’t move influencers or log new posts. This means your campaign data is preserved and locked, especially for time-sensitive seasonal campaigns.
You can also disable a campaign and convert it back into a regular list. To do this, open the campaign and click the Campaign Settings icon next to the campaign name.
Campaign Settings icon is present at the top left on the campaign screen as shown in the red box in the image below:
Inside settings, you’ll see an Active toggle. Turning this toggle OFF will disable Campaign Mode and revert the campaign back into a normal list.”
That’s it! You’ve successfully created and managed a campaign using Campaigns Mode.
Reach out anytime with our helpful Support team using the button at the bottom-right corner of your dashboard, or email us at [email protected].