When applications start coming in, you can find them in the Applications section, organized under Pending, Approved, or Rejected.
To review an application, click on it to check their responses and social accounts. Based on your assessment, you can choose to accept or reject the applicant.
When you approve an application, a window will appear allowing you to:
Onboard the influencer by generating their affiliate link
Create their discount code
Send a pre-designed Welcome email with all their details
Assign them to a list (the default is the Inbound Applications List)
If you’ve enabled pre-selected gifts in your form, SARAL will automatically ship the gift upon approval. Otherwise, you will need to ship gifts manually, either individually from influencer profiles or in bulk for multiple accepted applications. For shipping instructions, check this:
How to ship free product to influencers?
How to ship free product to influencers?


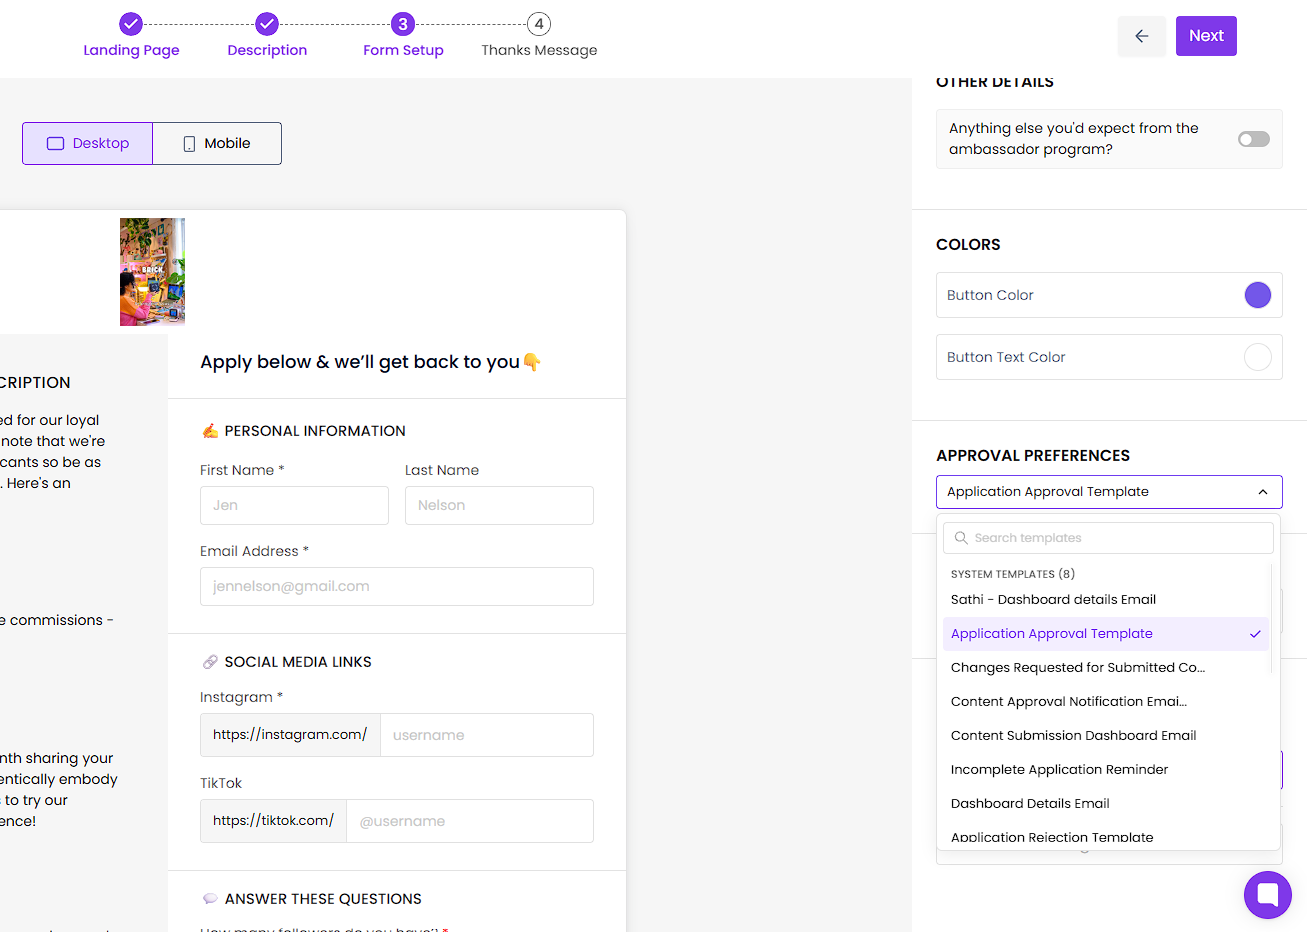
Set an Approval Email for Your Form
Each application form can have its own approval email. When you approve someone who applied through a form, SARAL sends them the email selected for that form, so you can send different approval messages for different programs without editing one shared template.
To set it, go to Approval Preferences within your form settings and select an email template from the dropdown. You can choose a system template or one of your own custom emails, and use the search bar to find a template by name.

Reach out anytime with our helpful Support team using the button at the bottom-right corner of your dashboard, or email us at [email protected].